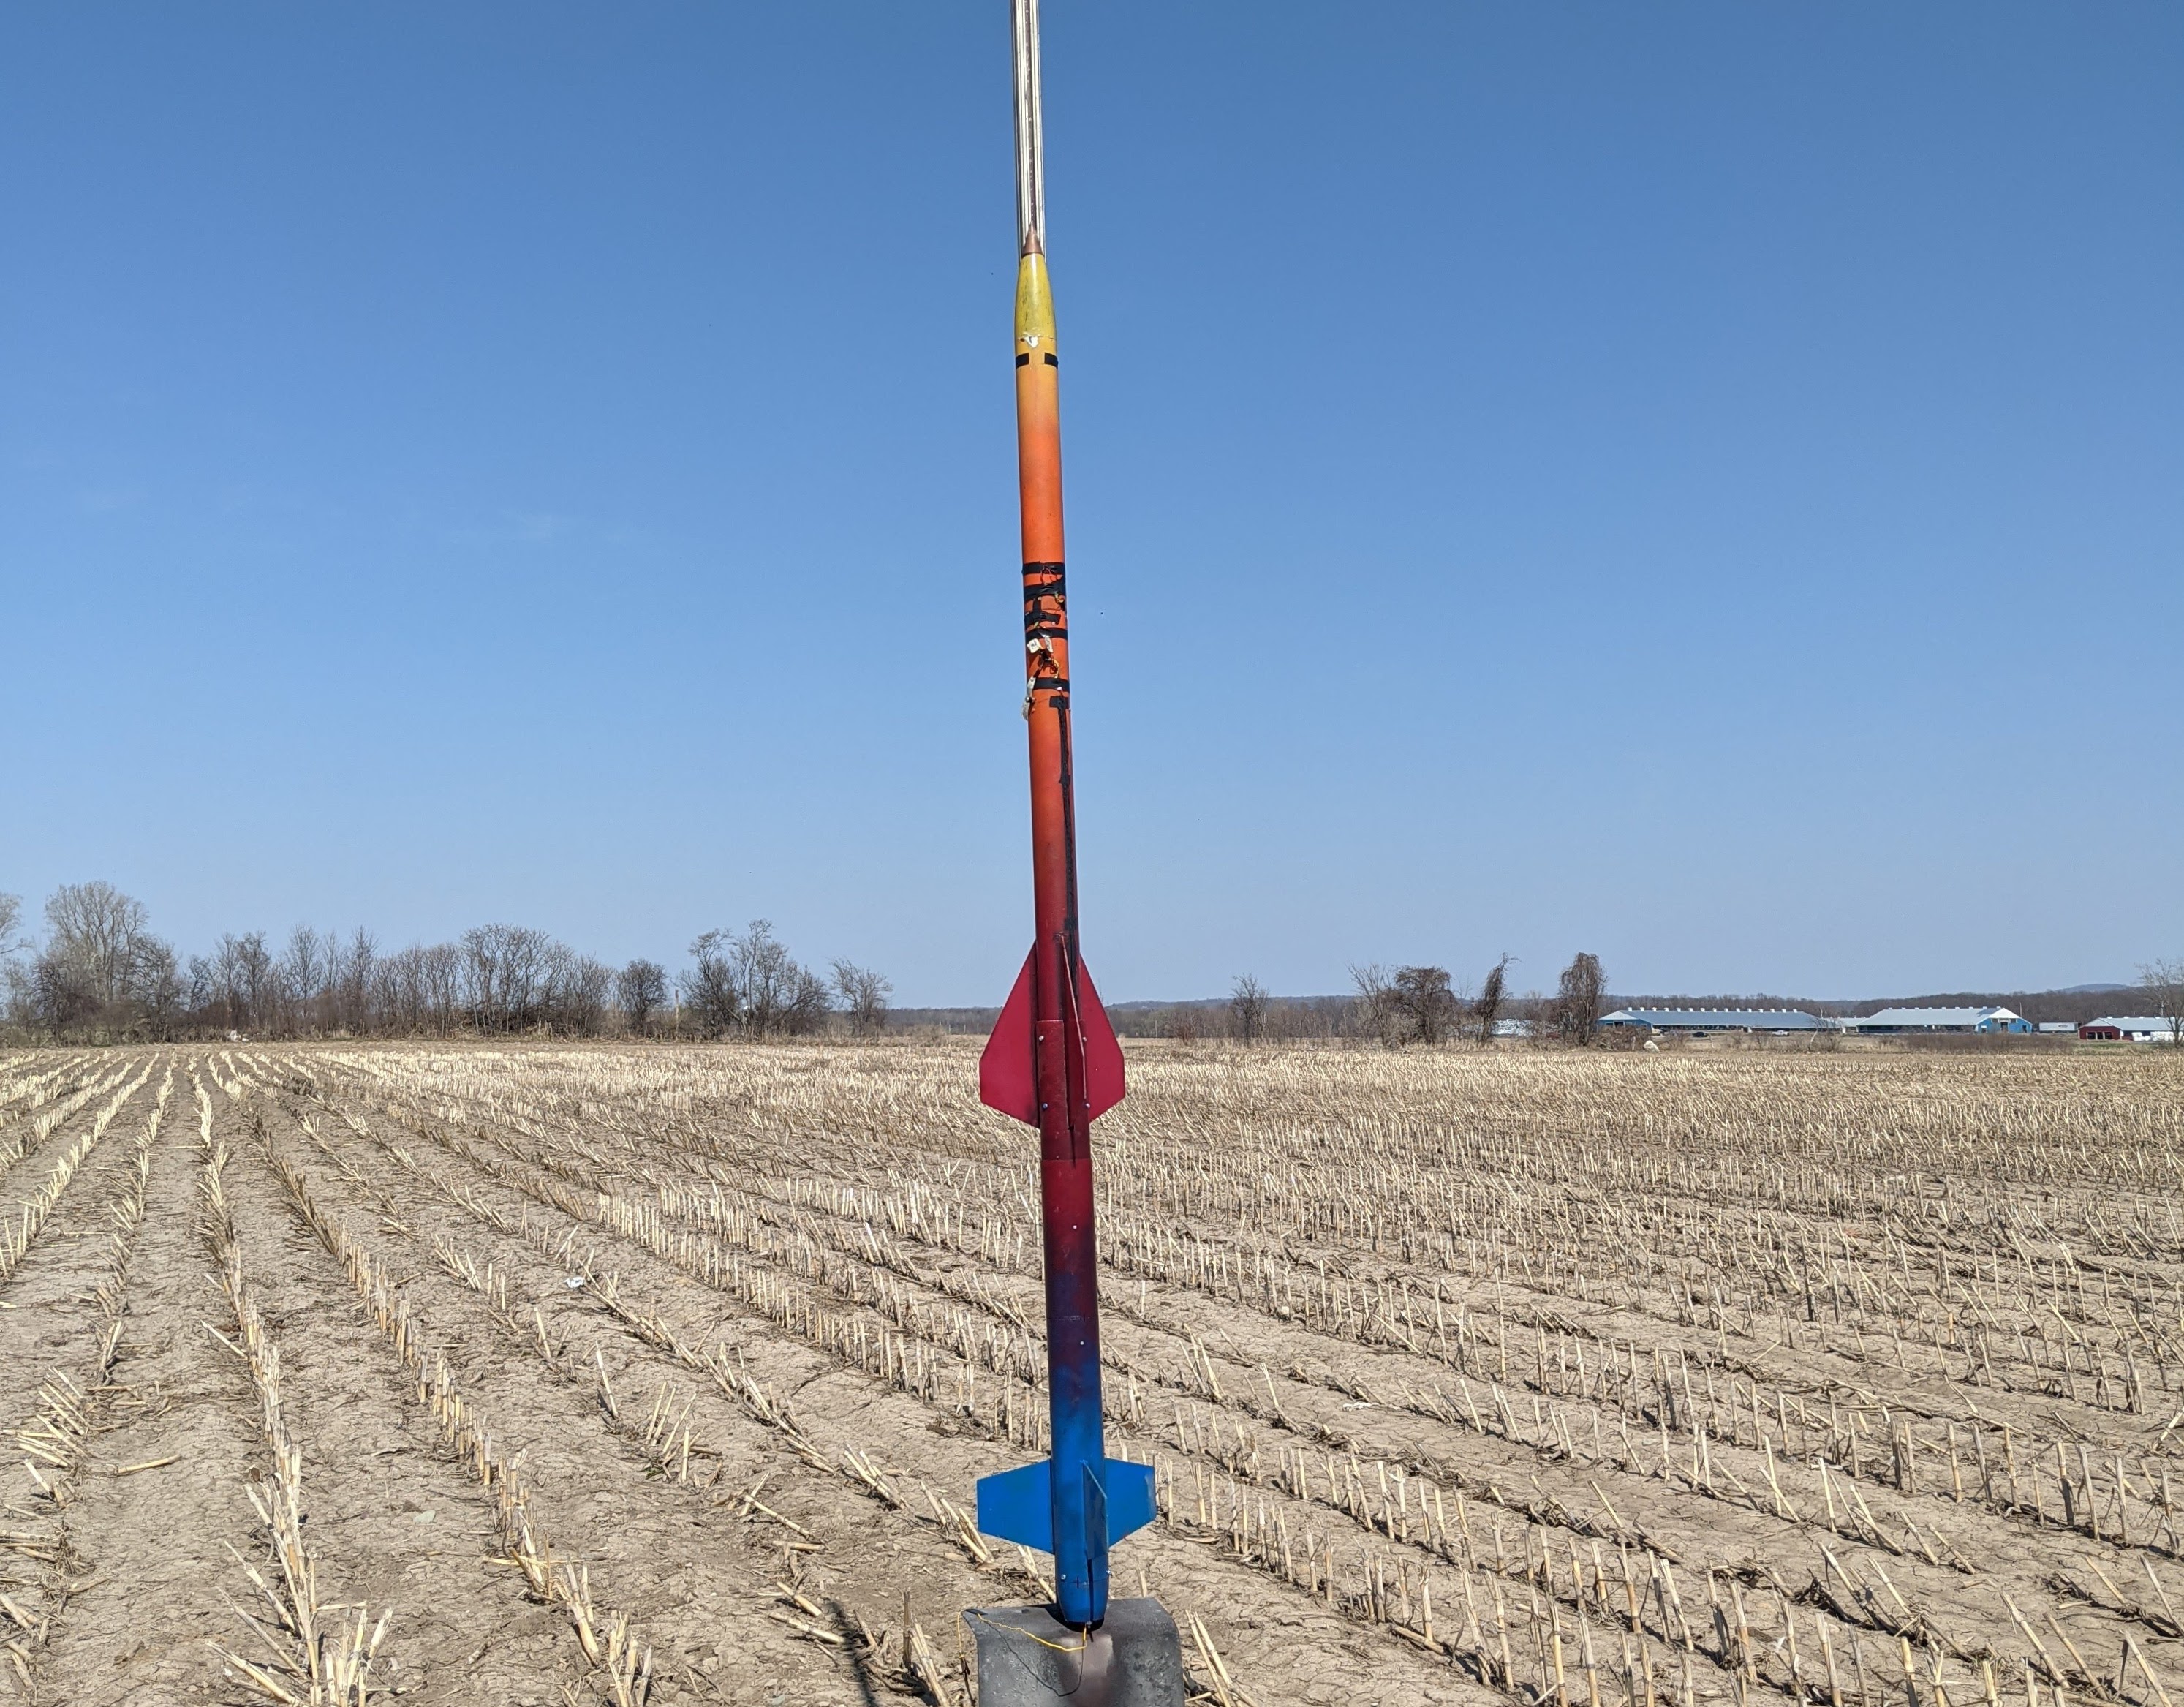
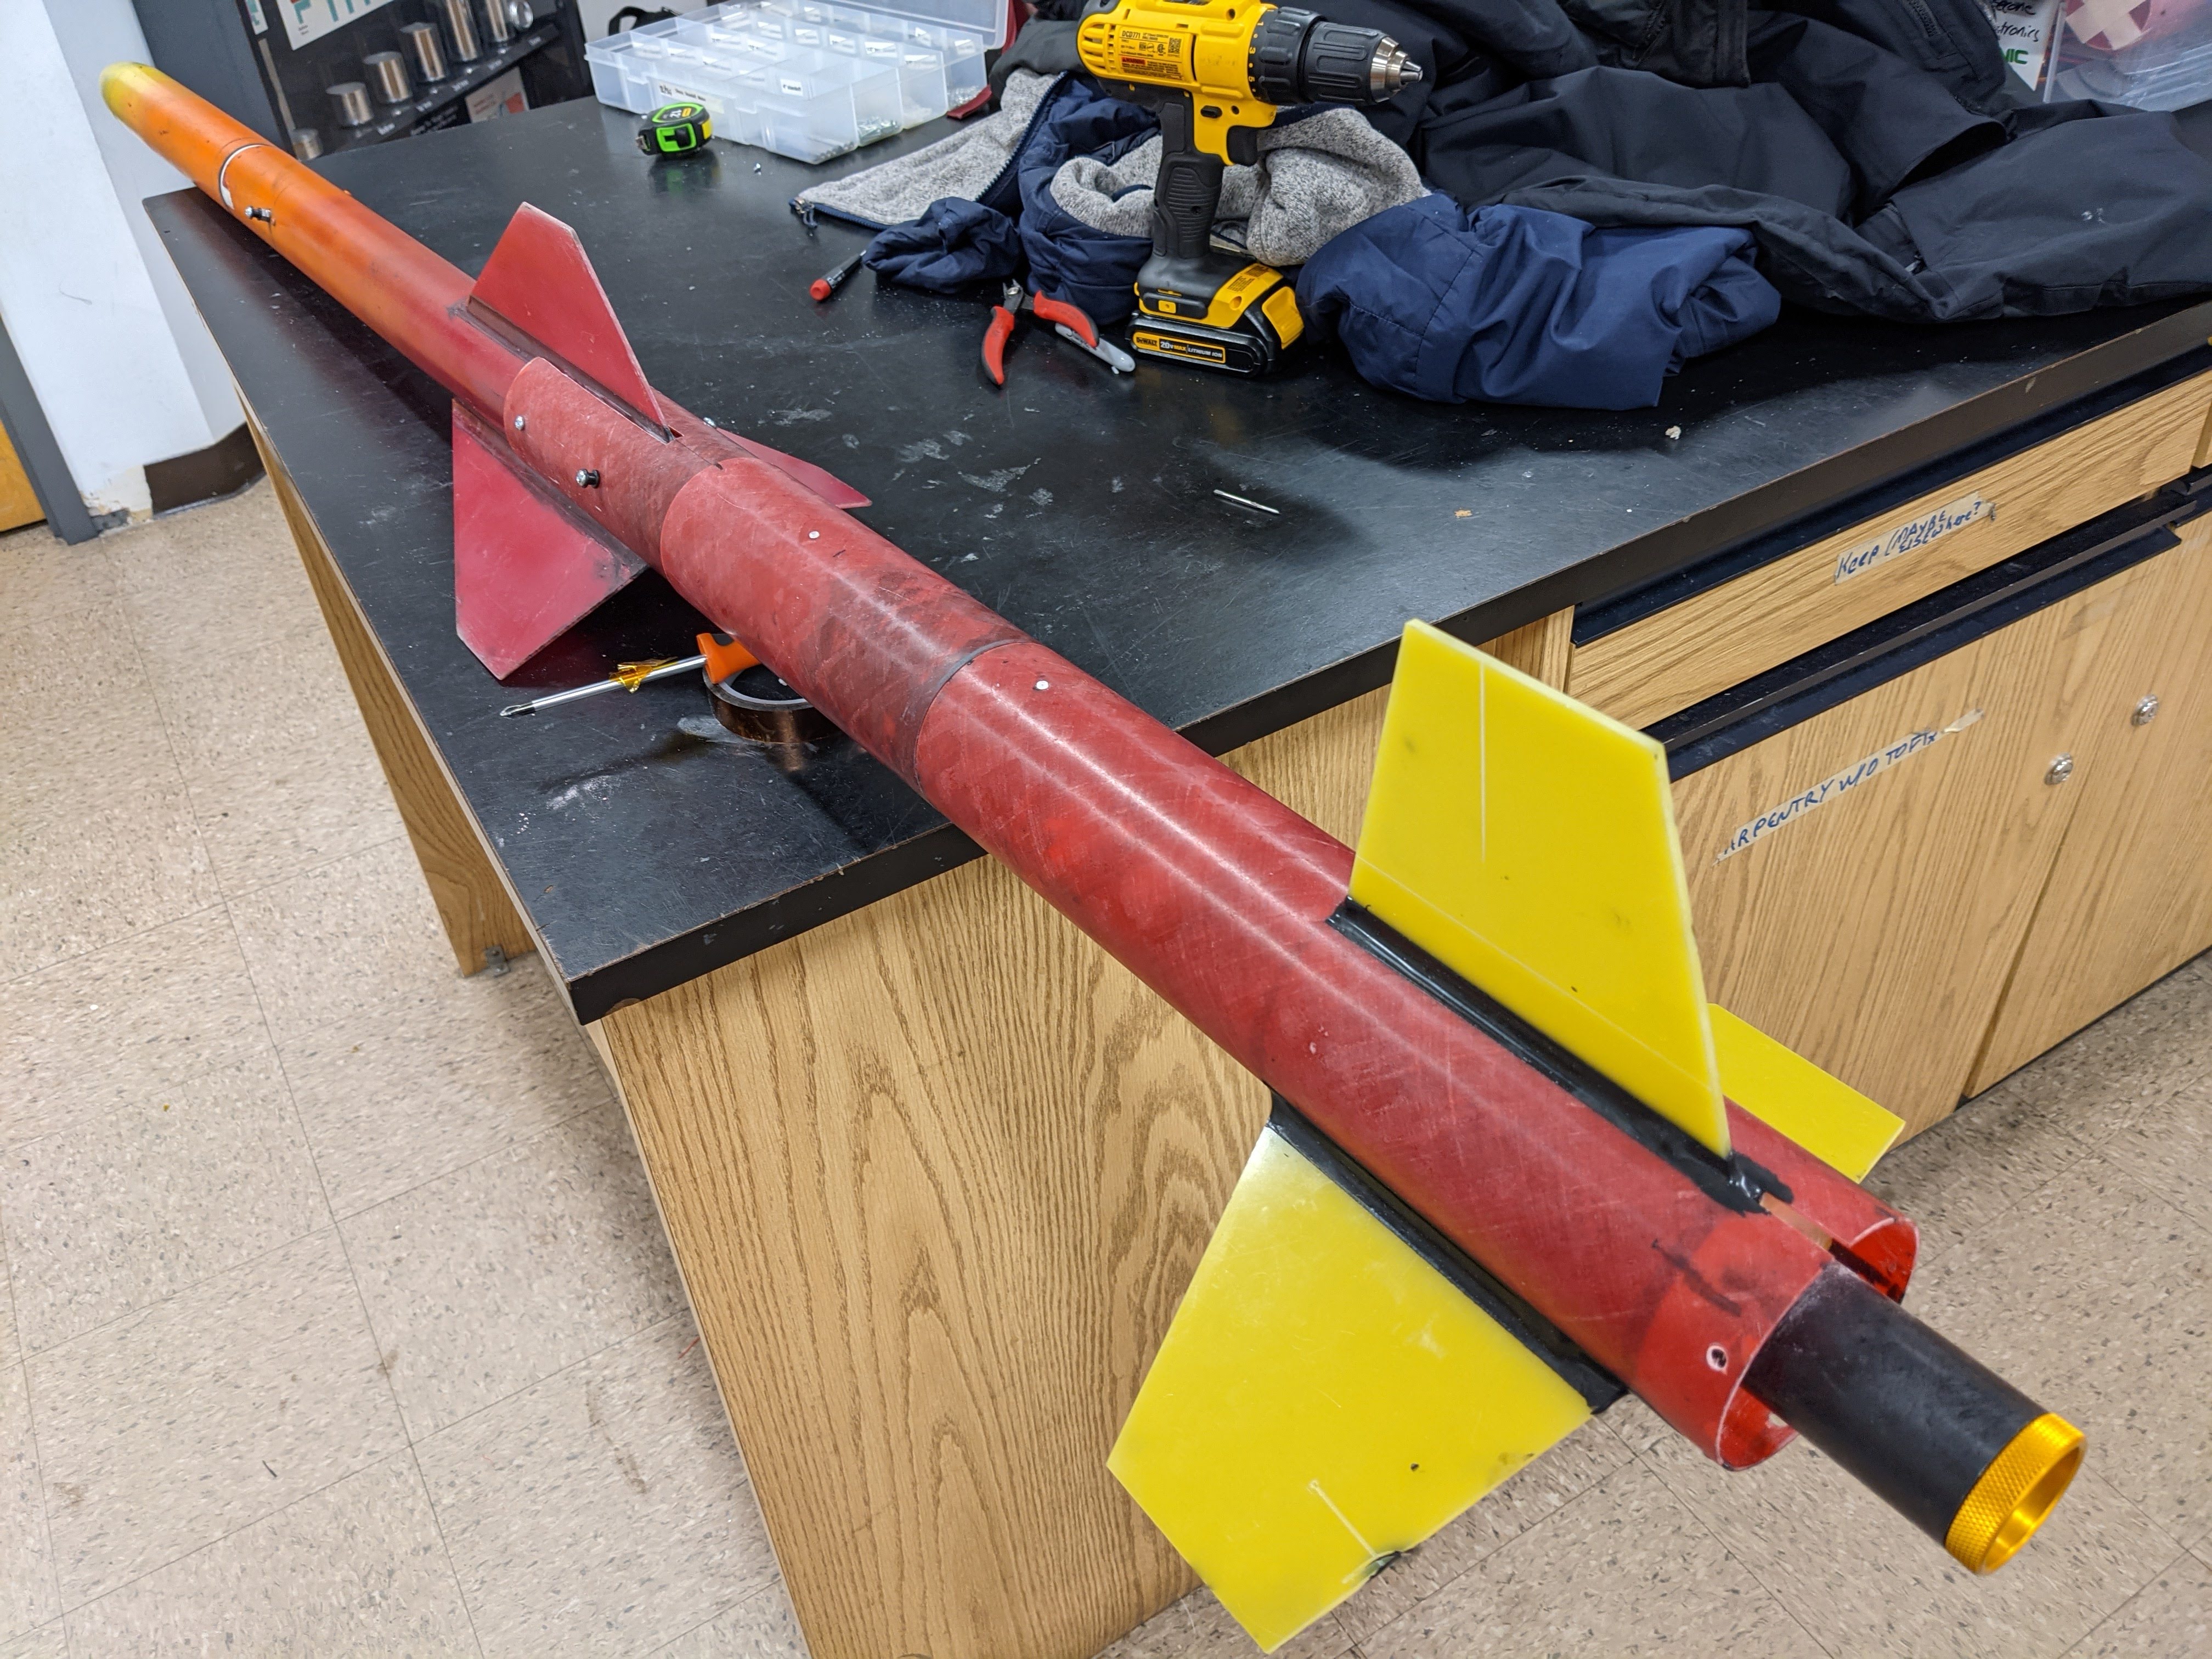
Moving into the Spring 2023 semester, AerospaceNU’s Project Redshift decided to construct and write flight software for a two-stage, high-power model rocket. Beanstack (pictured above) met our requirements and provided a low-risk platform on which we could develop the necessary software and procedures to safely fly multi-stage rockets.
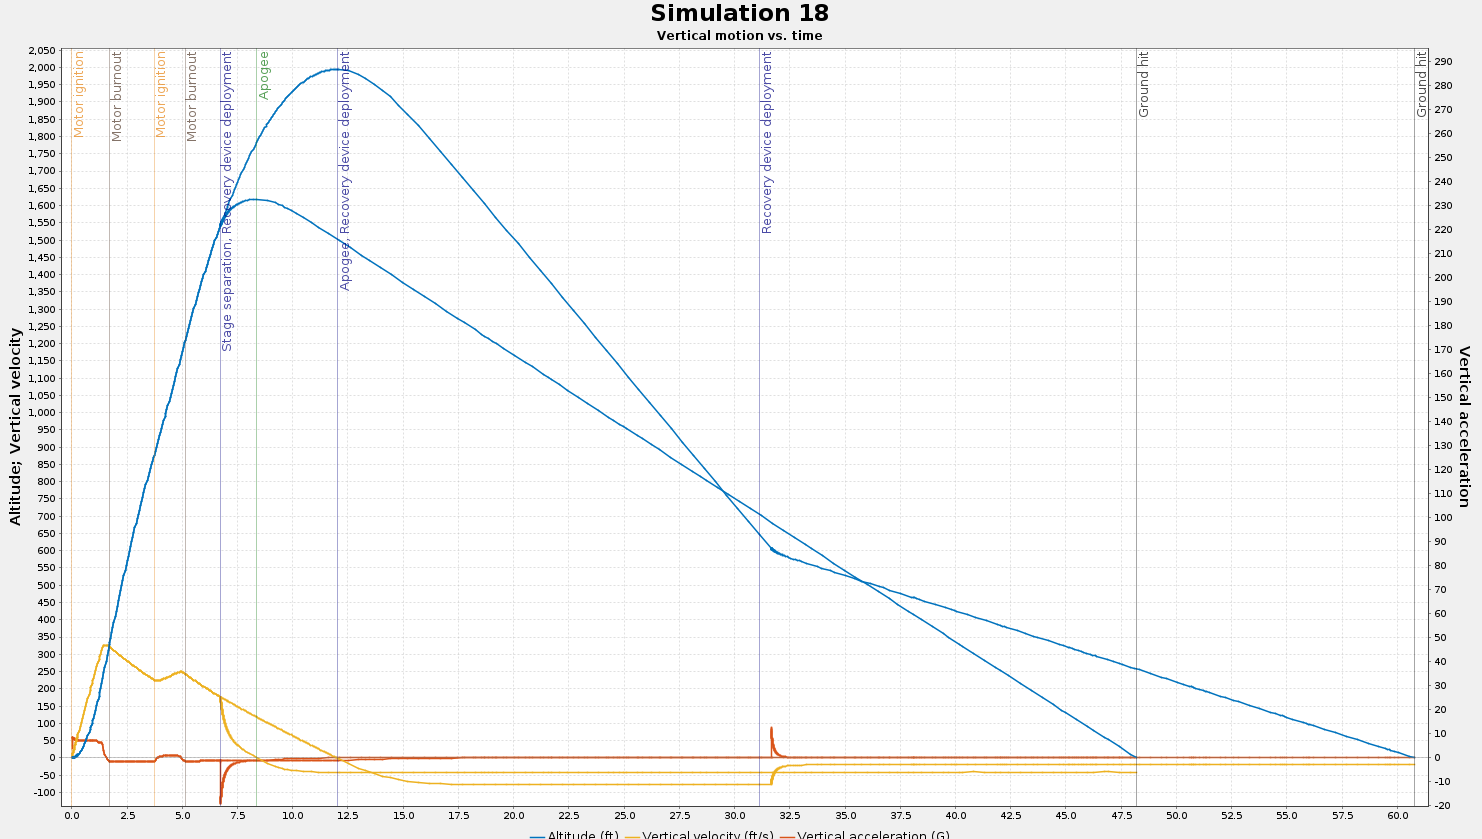
The design we landed on was the airframe from Beanboozler on top of a new, 3in fiberglass booster. The two stages would separate using a black powder charge in the interstage, and the custom electronics already in Beanboozler would ignite its rocket motor shortly afterwords. After an initial launch attempt in March 2023 was scrubbed, we had a successful flight in April, flying to just over 2100ft using a I327-DM booster motor and G72-DM sustainer motor. I helped lead the initial mechanical design, organized and implemented feedback from internal and external design reviews, and debugged the embedded software required to fly this rocket safely.
Through this project, I developed my composite fabrication and collaboration skills while flying my university team’s first two-stage high-power rocket.


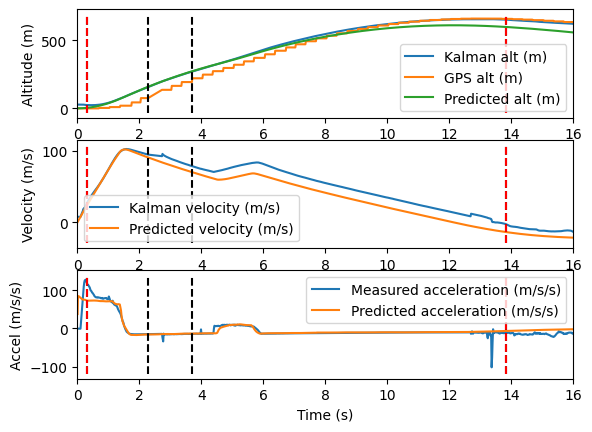
Post-flight data analysis shows that the flight went pretty much exactly as we expected it to, which builds confidence for pushing the system higher and faster in future launches.
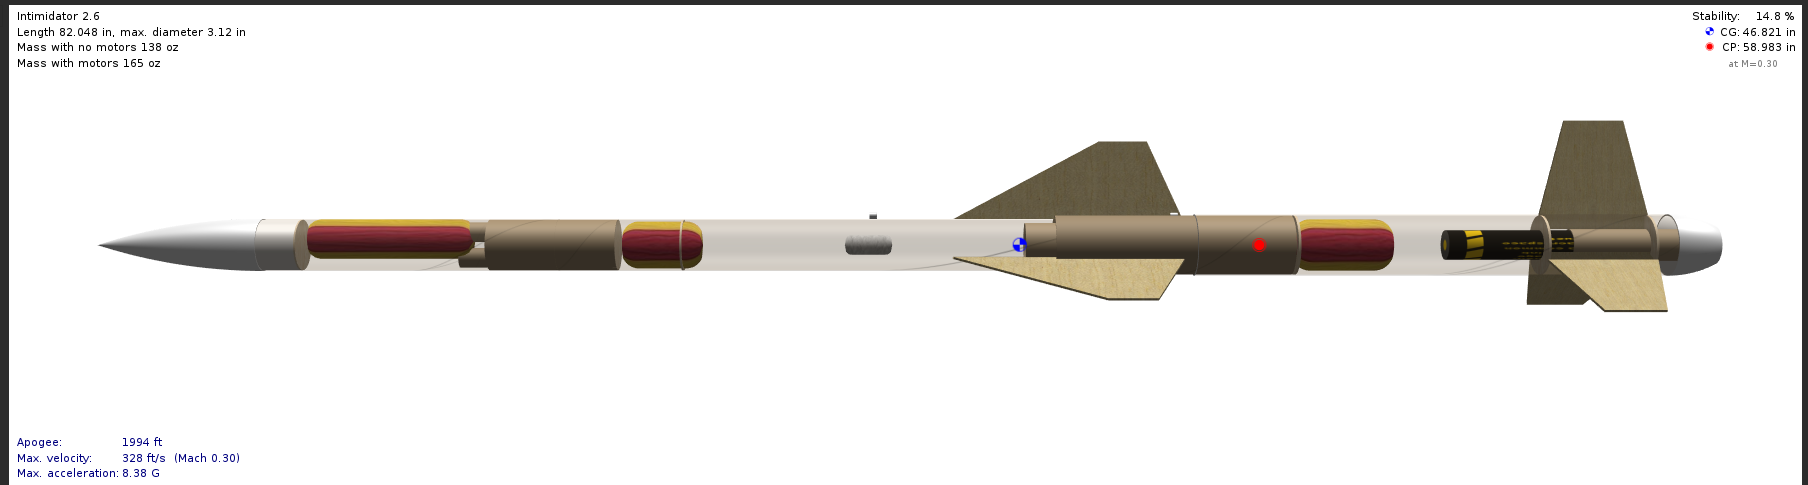
Booster Construction
The booster (above) is composed of an upper interstage section and lower motor mount section. The motor section is traditionally designed, with through-the-wall fins, which are epoxied using Proline 4500 epoxy to both the inner motor mount tube and to the exterior airframe tube. These epoxy bonds transfer thrust loading from the rocket motor into the airframe, and eventually into the sustainer above.
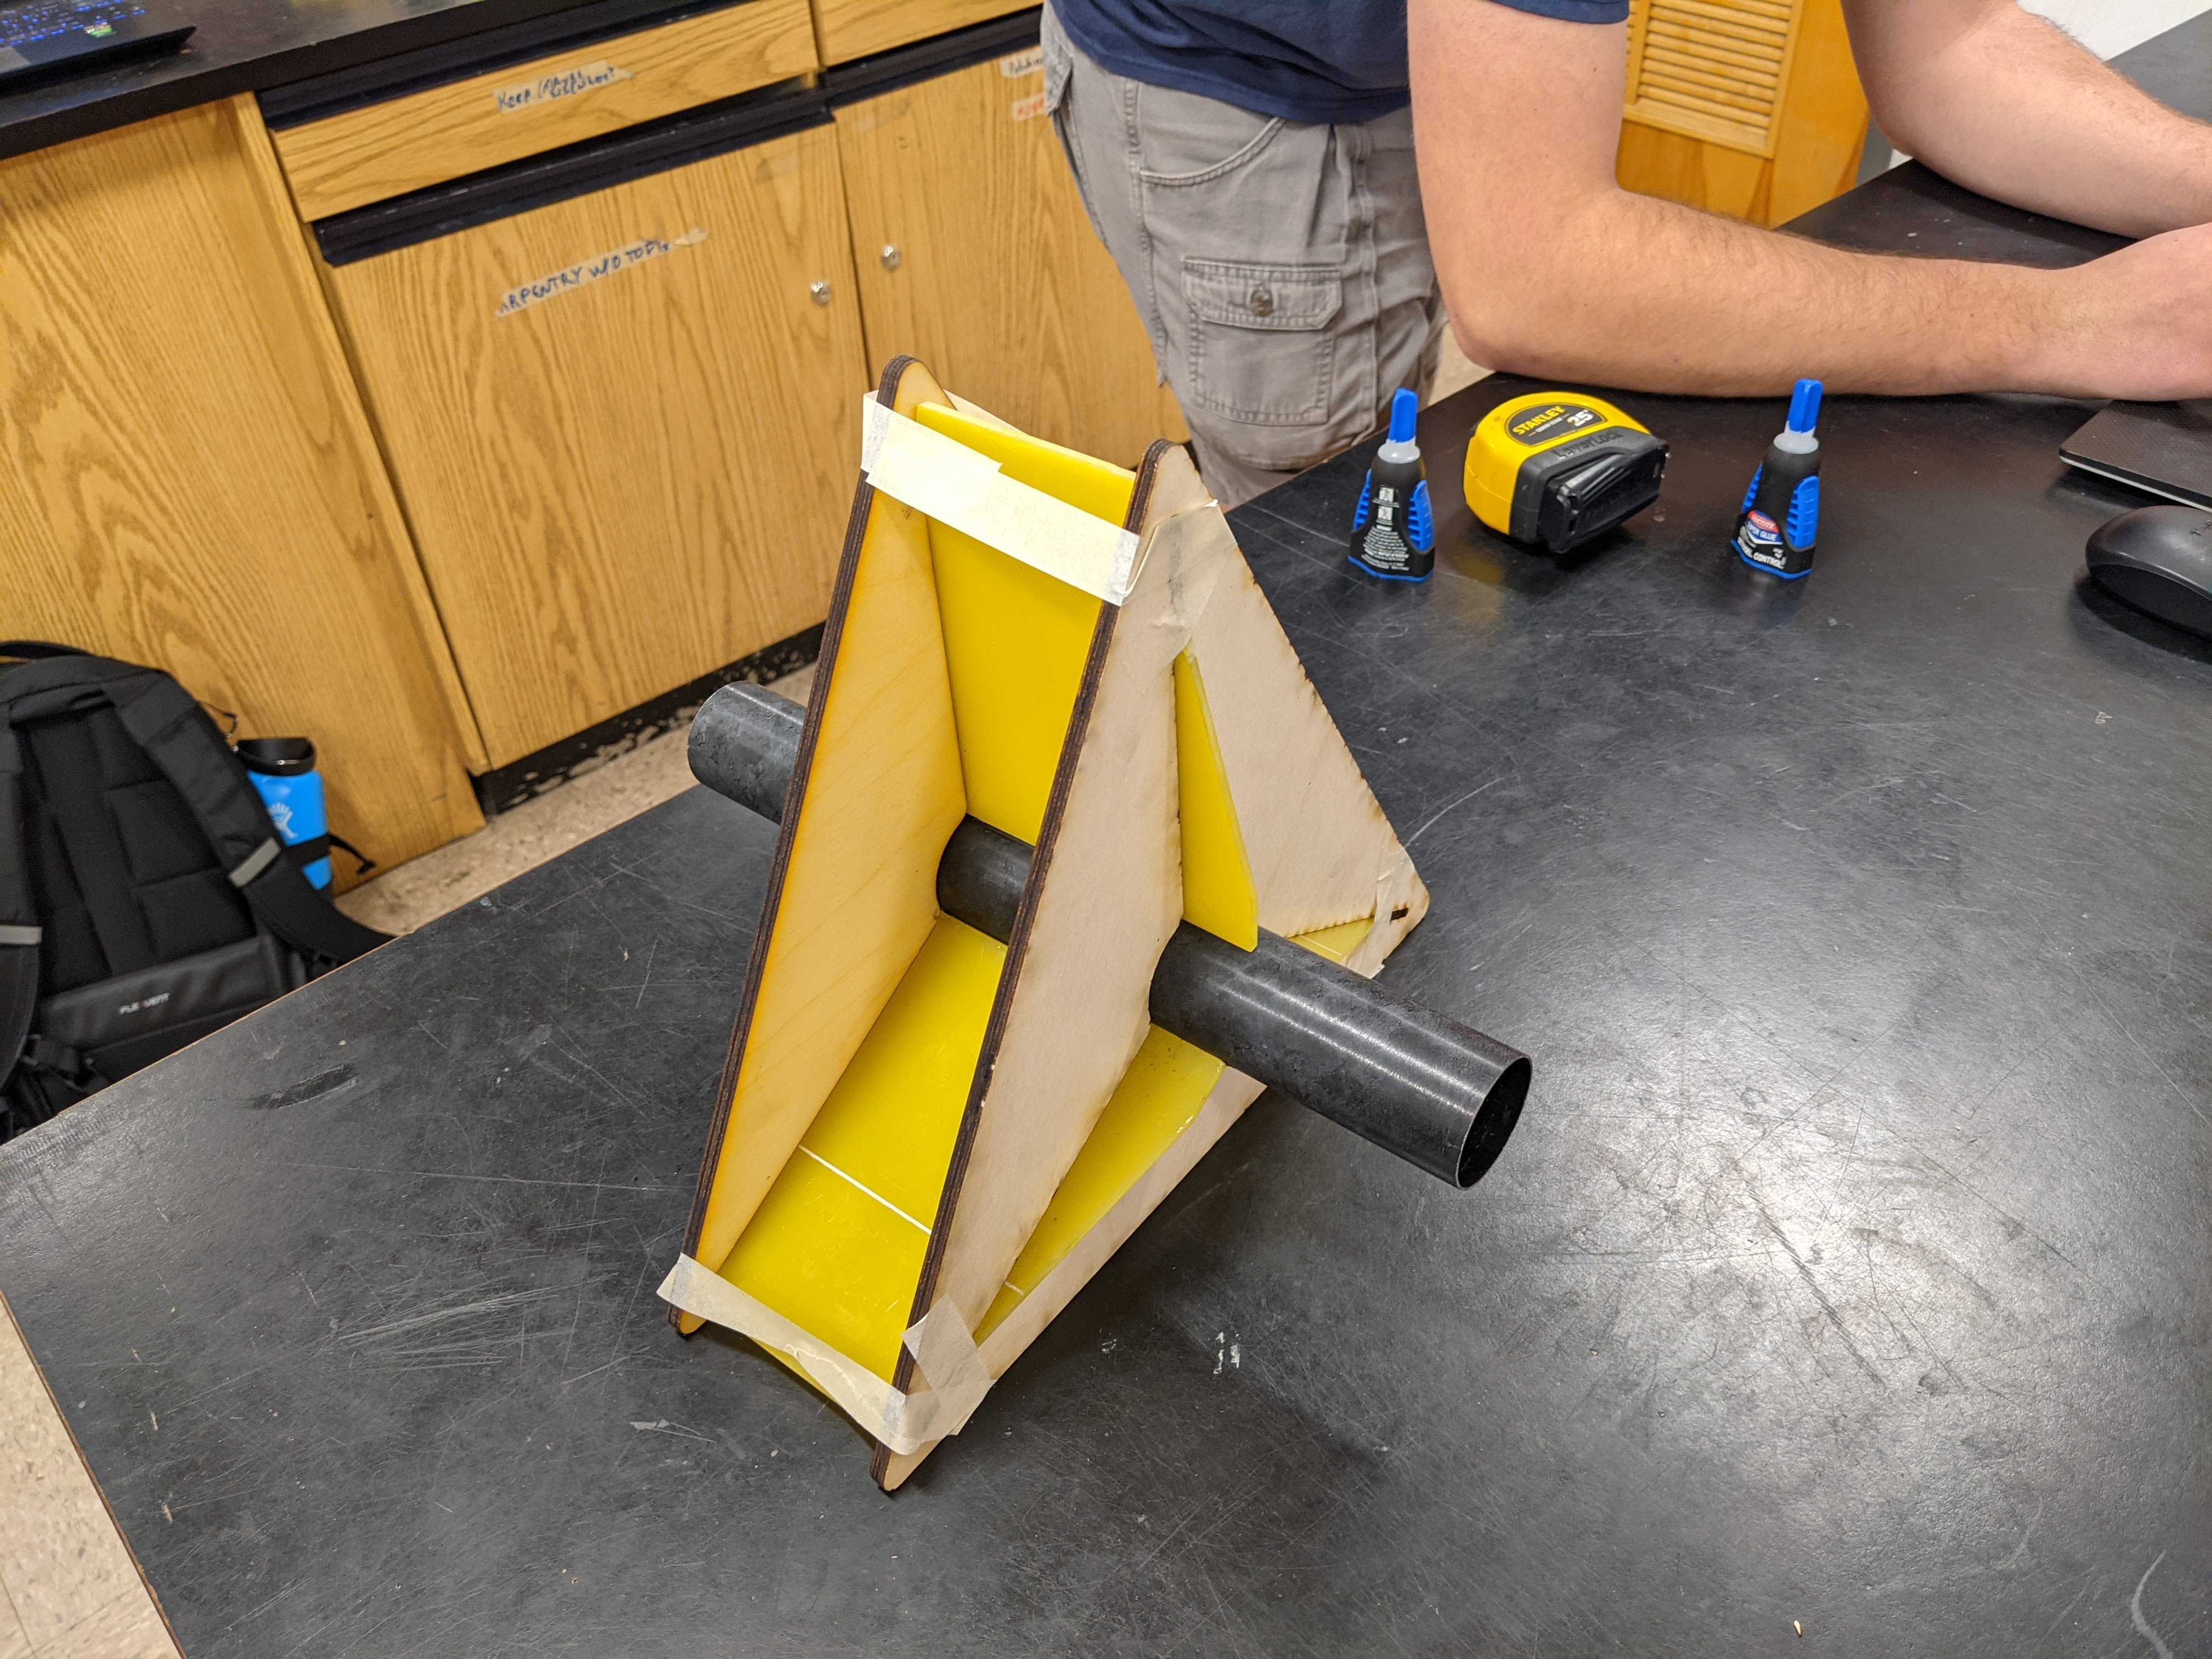
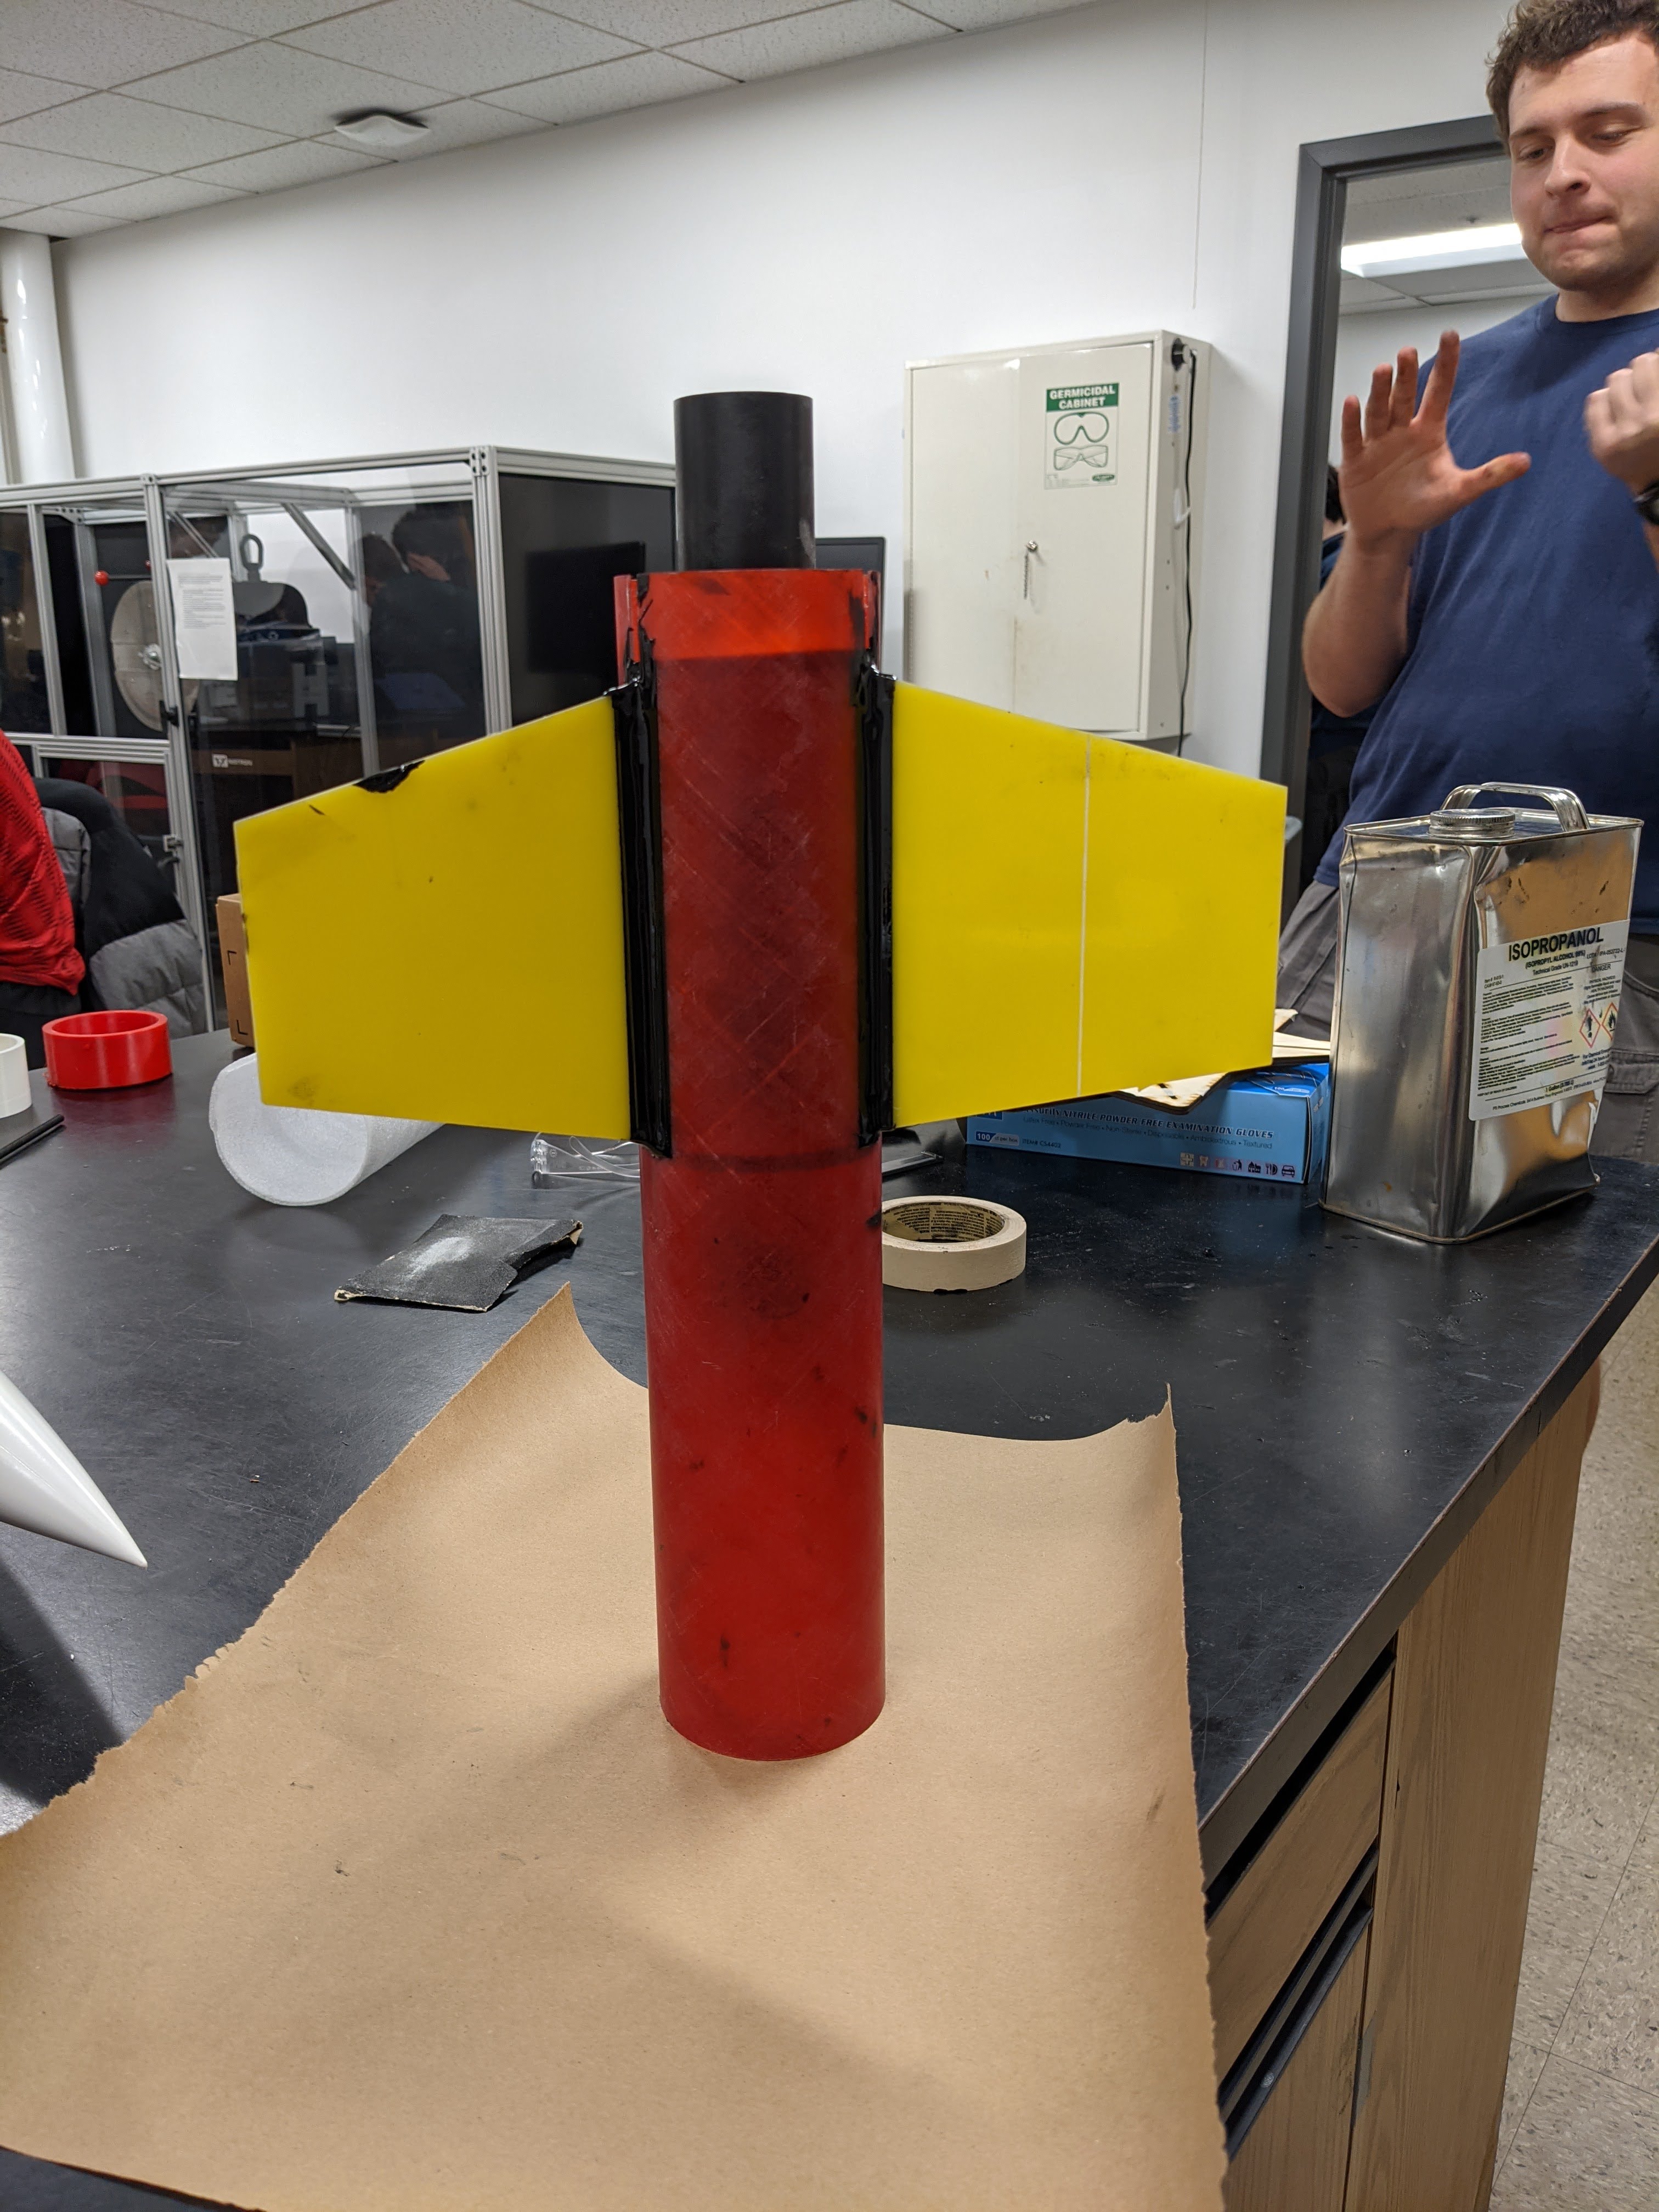
First, a triangular fin jig was used to align and tack the 3 fins in place using super glue. After adding a small internal epoxy fillet, the assembly was slid into the pre-slotted red airframe tube and 0.5in radius fillets were added.
Software & Safety
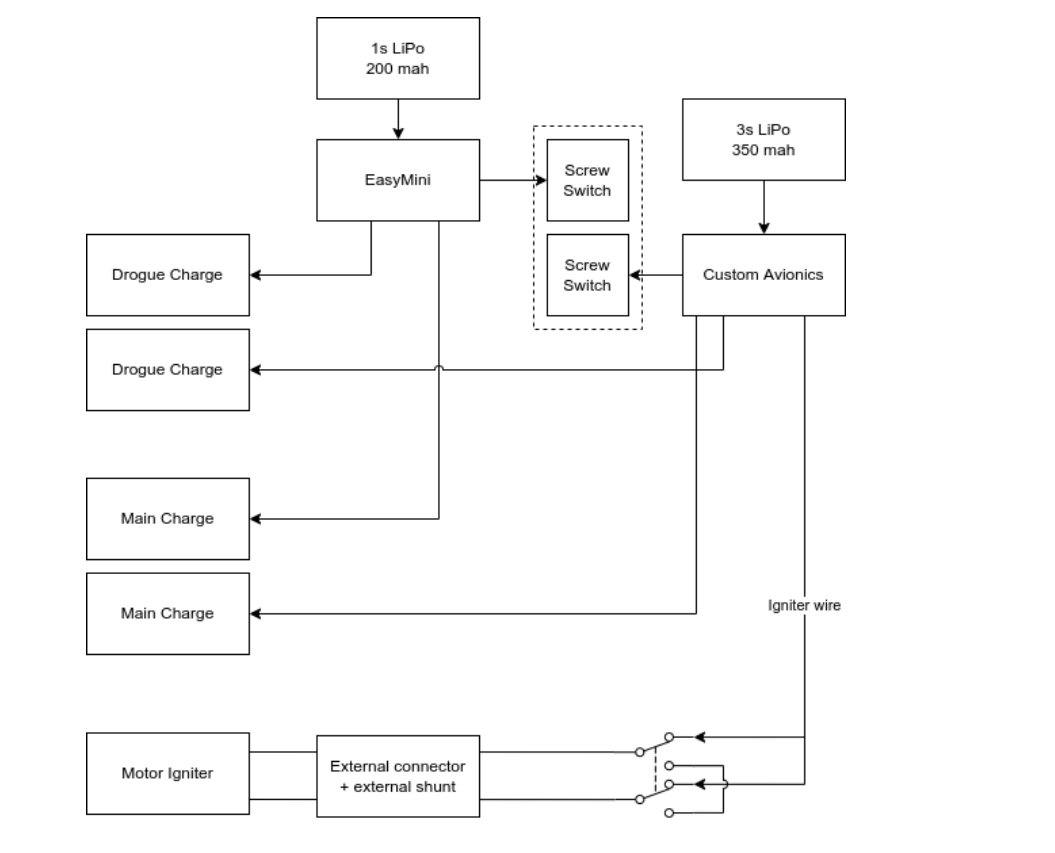
It’s super important that the electrical and software systems for this rocket have no failure modes in which a motor can ignite while a person is nearby. We achieved this in hardware by only connecting a electrically-shorted igniter immediately before launch at the pad, and only removing the shunt as the very last checklist item before leaving the pad.
In software, we added and extensively tested altitude, velocity, and angle lockouts to prevent premature motor ignition. But we still relied on hardware controls as much as possible. The final set of configurations we settled on for sustainer ignition on the first launch was:
- Flight computer has not restarted since launch
- More than 2 seconds after motor burnout
- Have not reached apogee
- Vertical velocity > 30 m/s
- Angle to vertical < 40 degrees
- Maximum ever angle angle to vertical < 34 degrees
- Cannot be fired manually
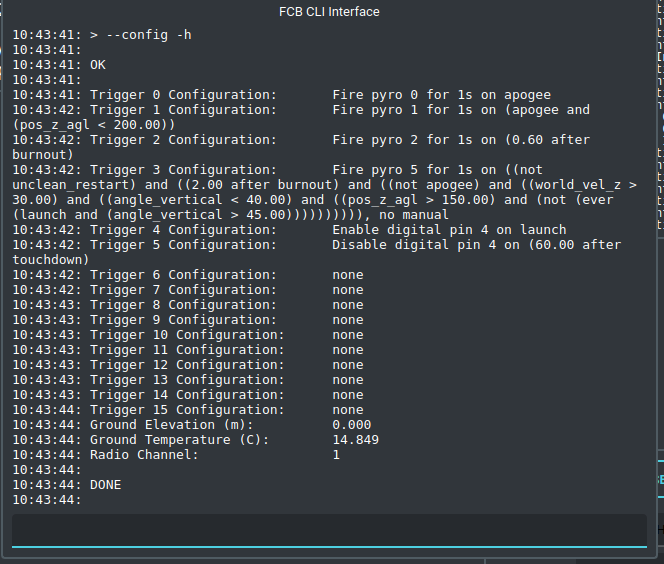
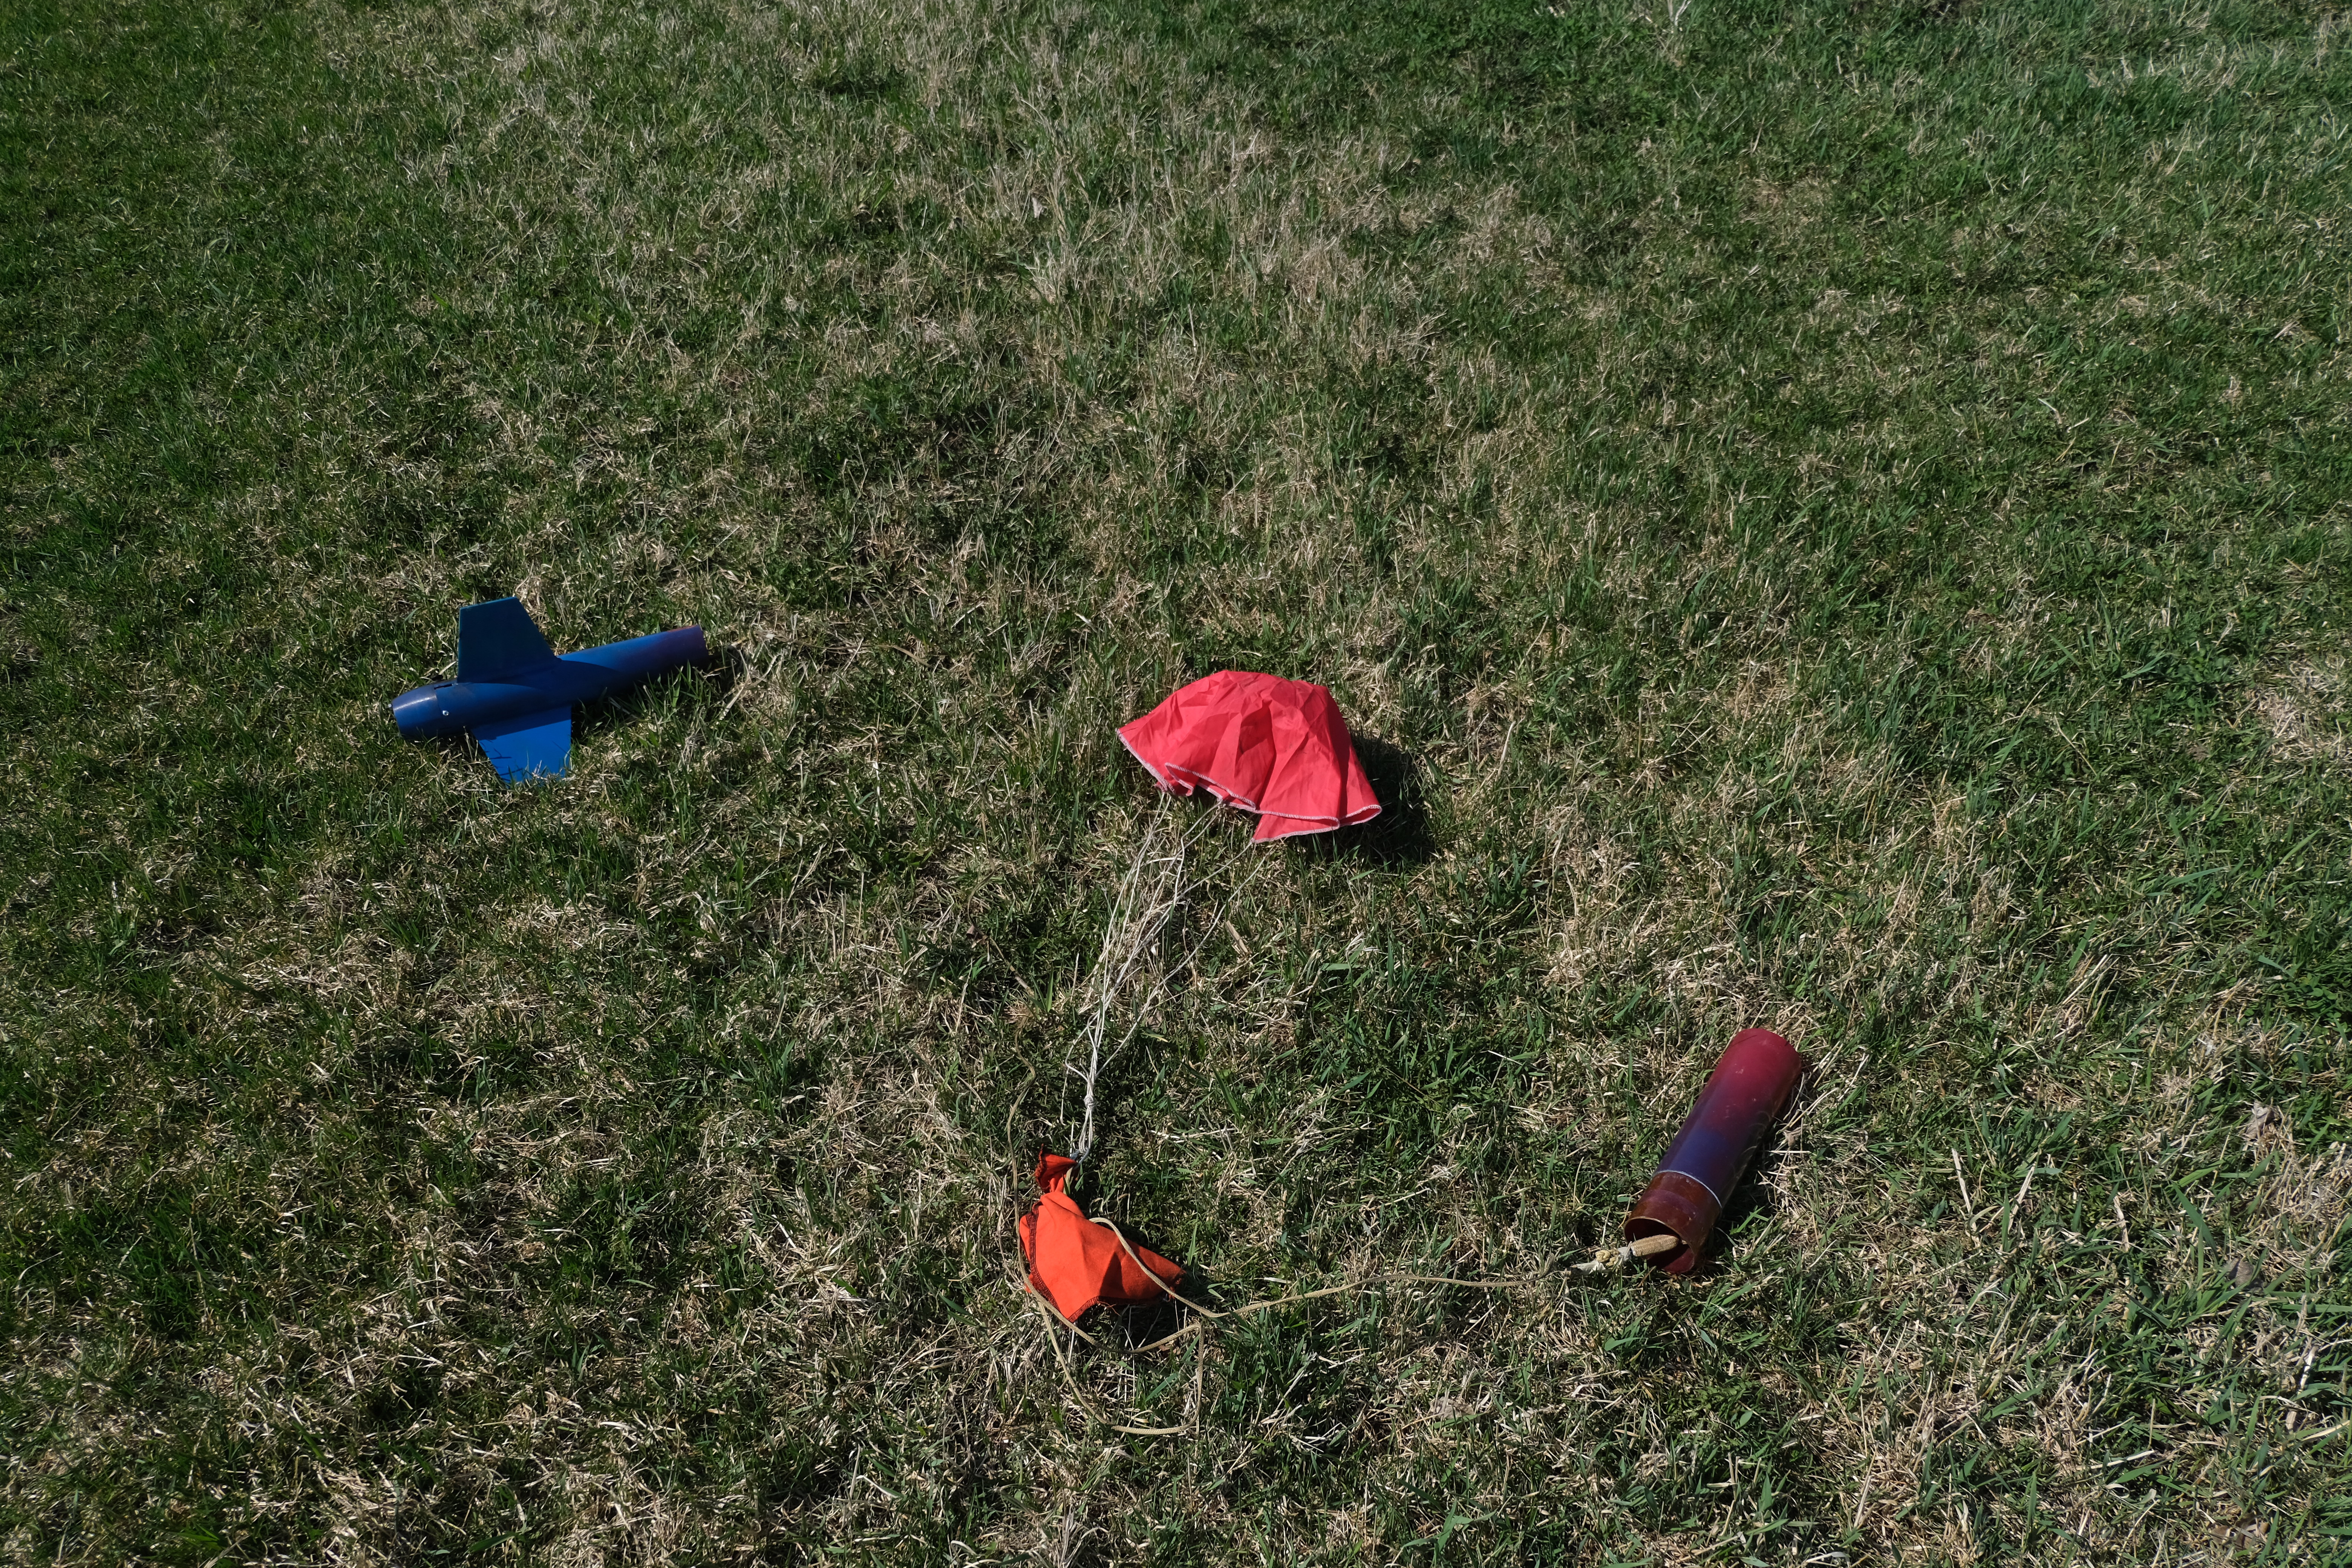
The first flight in April used the above lockouts for sustainer ignition, and they were all satisfied during flight, allowing for the sustainer rocket motor to be ignited. The video below shows our view on the ground using the Python-based GUI I helped develop. The two motor burns can be seen in the acceleration readout in the top right widget.
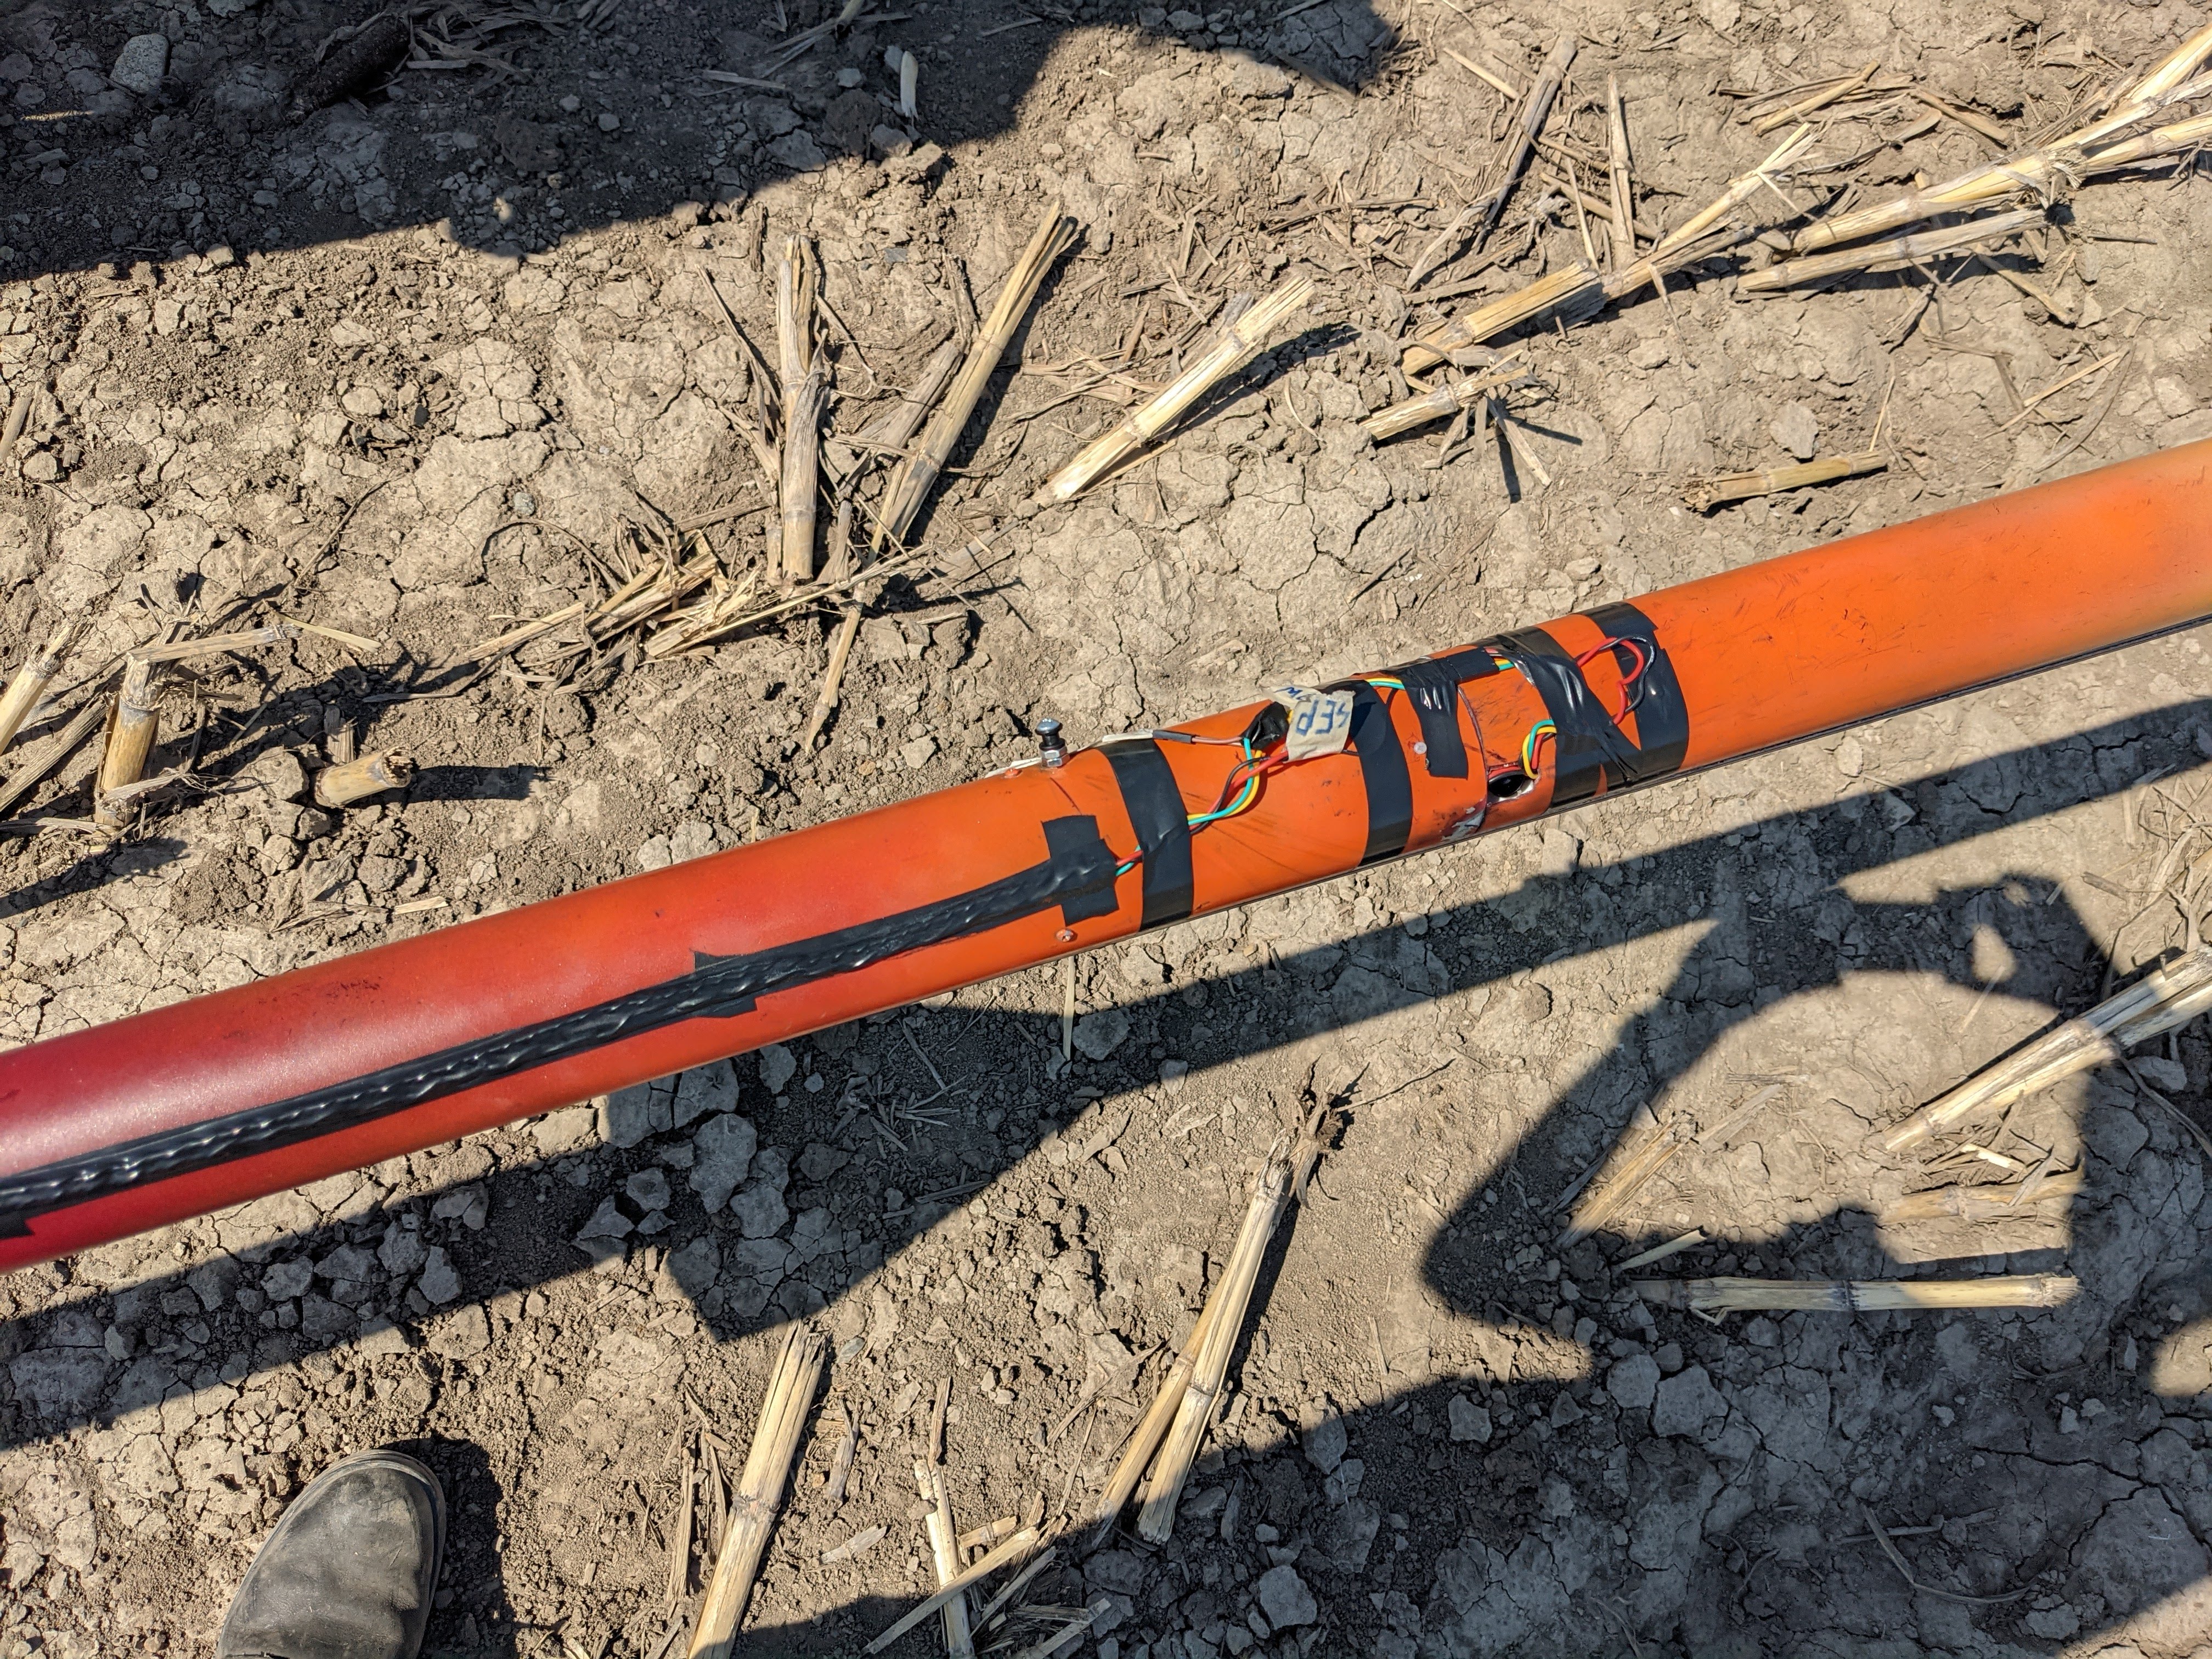
Screw Switch Issues
During the first launch attempt, we got as far as putting the rocket onto the pad before we ran into issues with radio communication. After troubleshooting at the pad, we disassembled the rocket and discovered that the flight battery had been drained. The root cause was tracked down to a shorted PCB screw switch, which had a tiny bit of solder making contact and draining the battery in storage.
It’s a little difficult to tell in these microscope pictures, but note the solder blob on the right that’s just inside the hole compared to the second image.
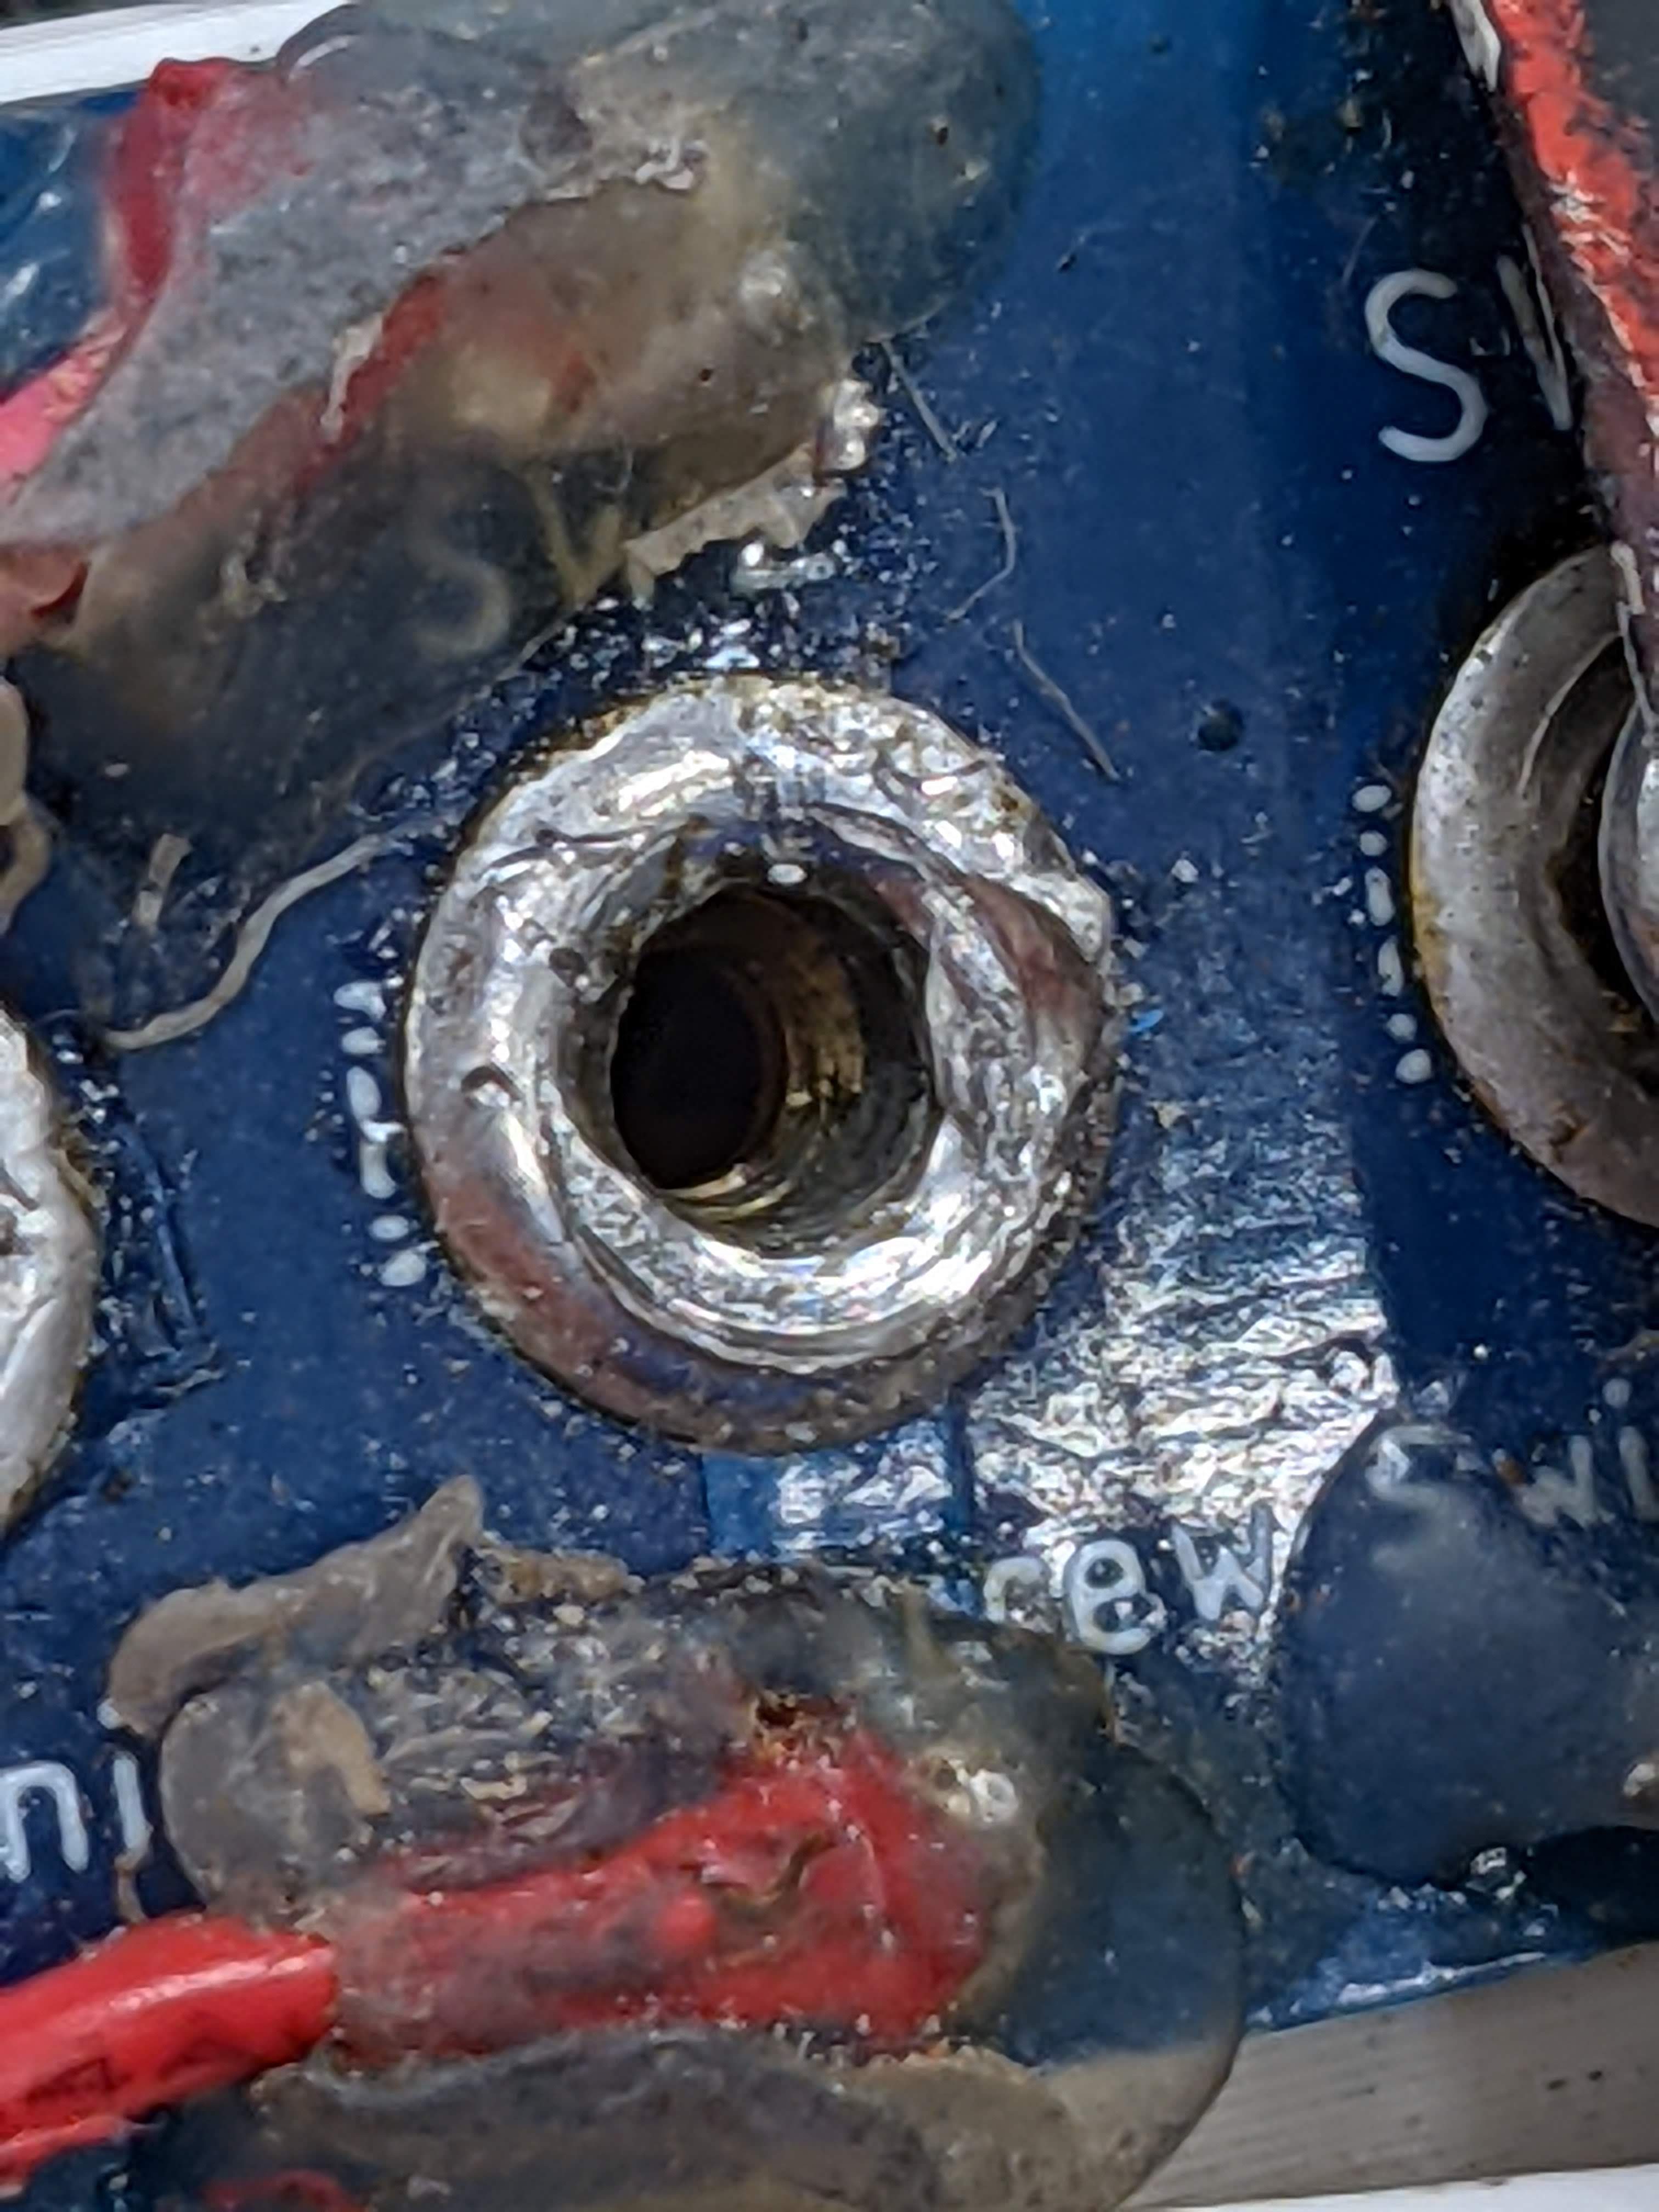
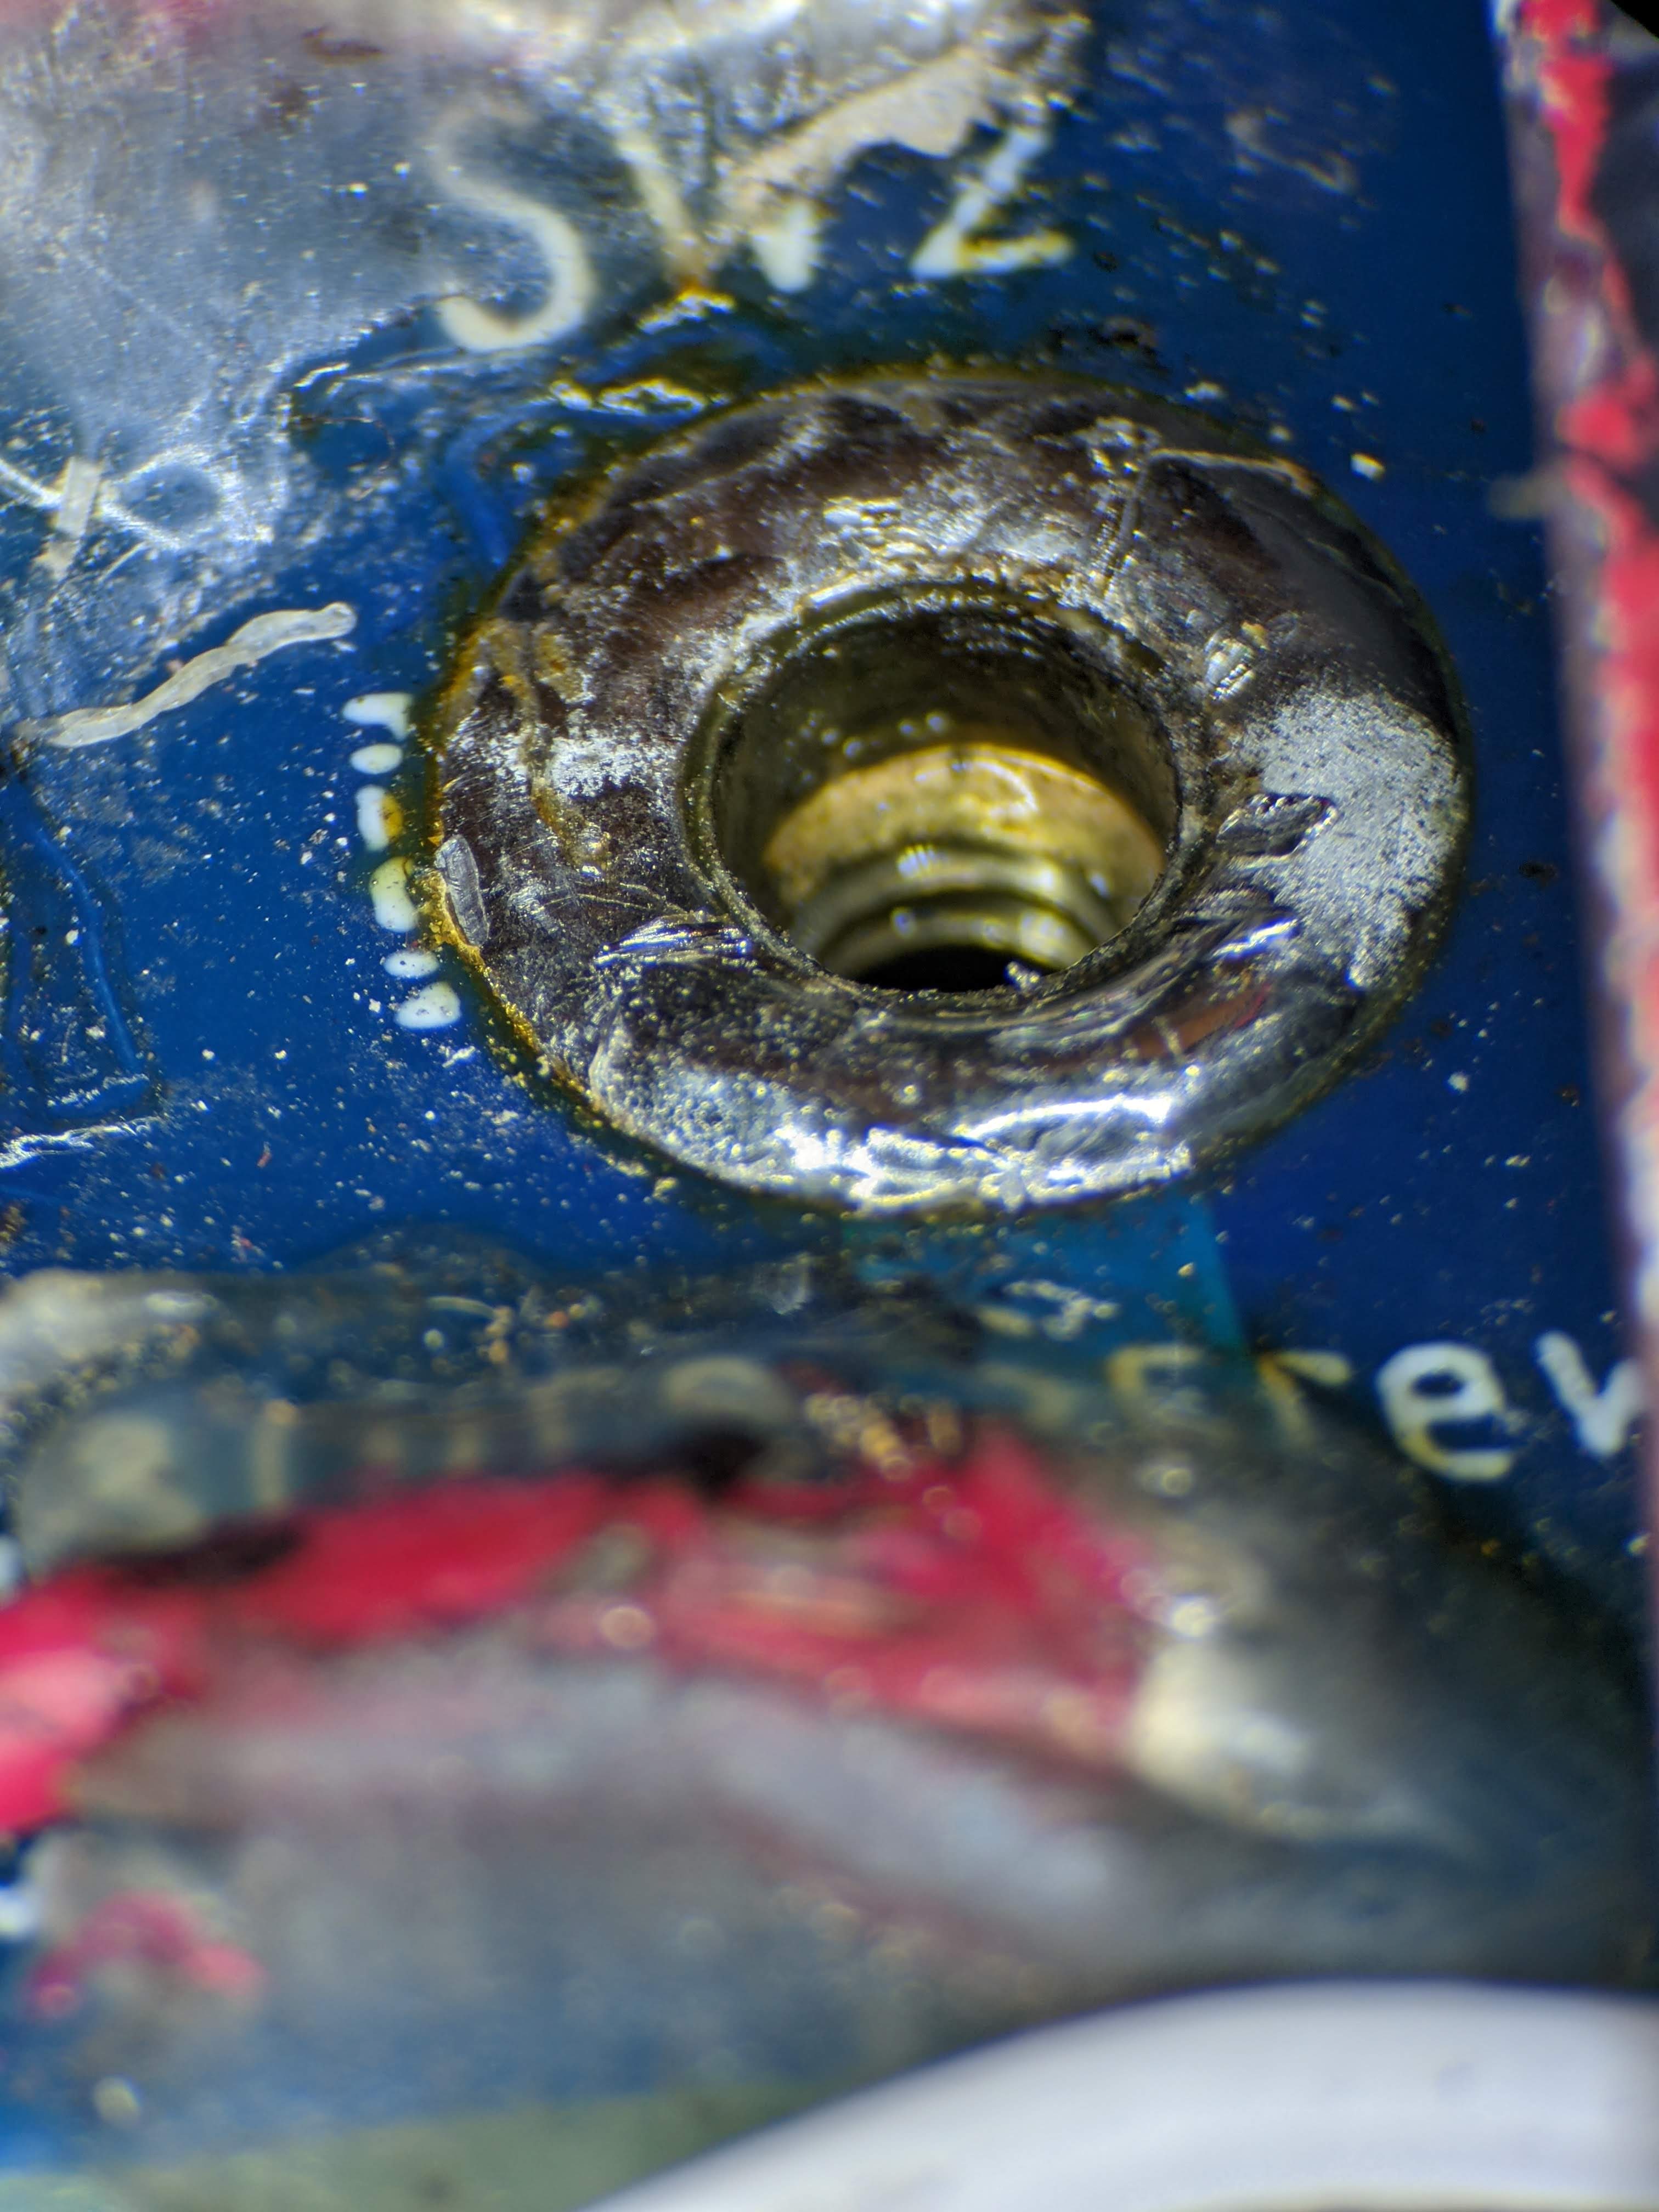
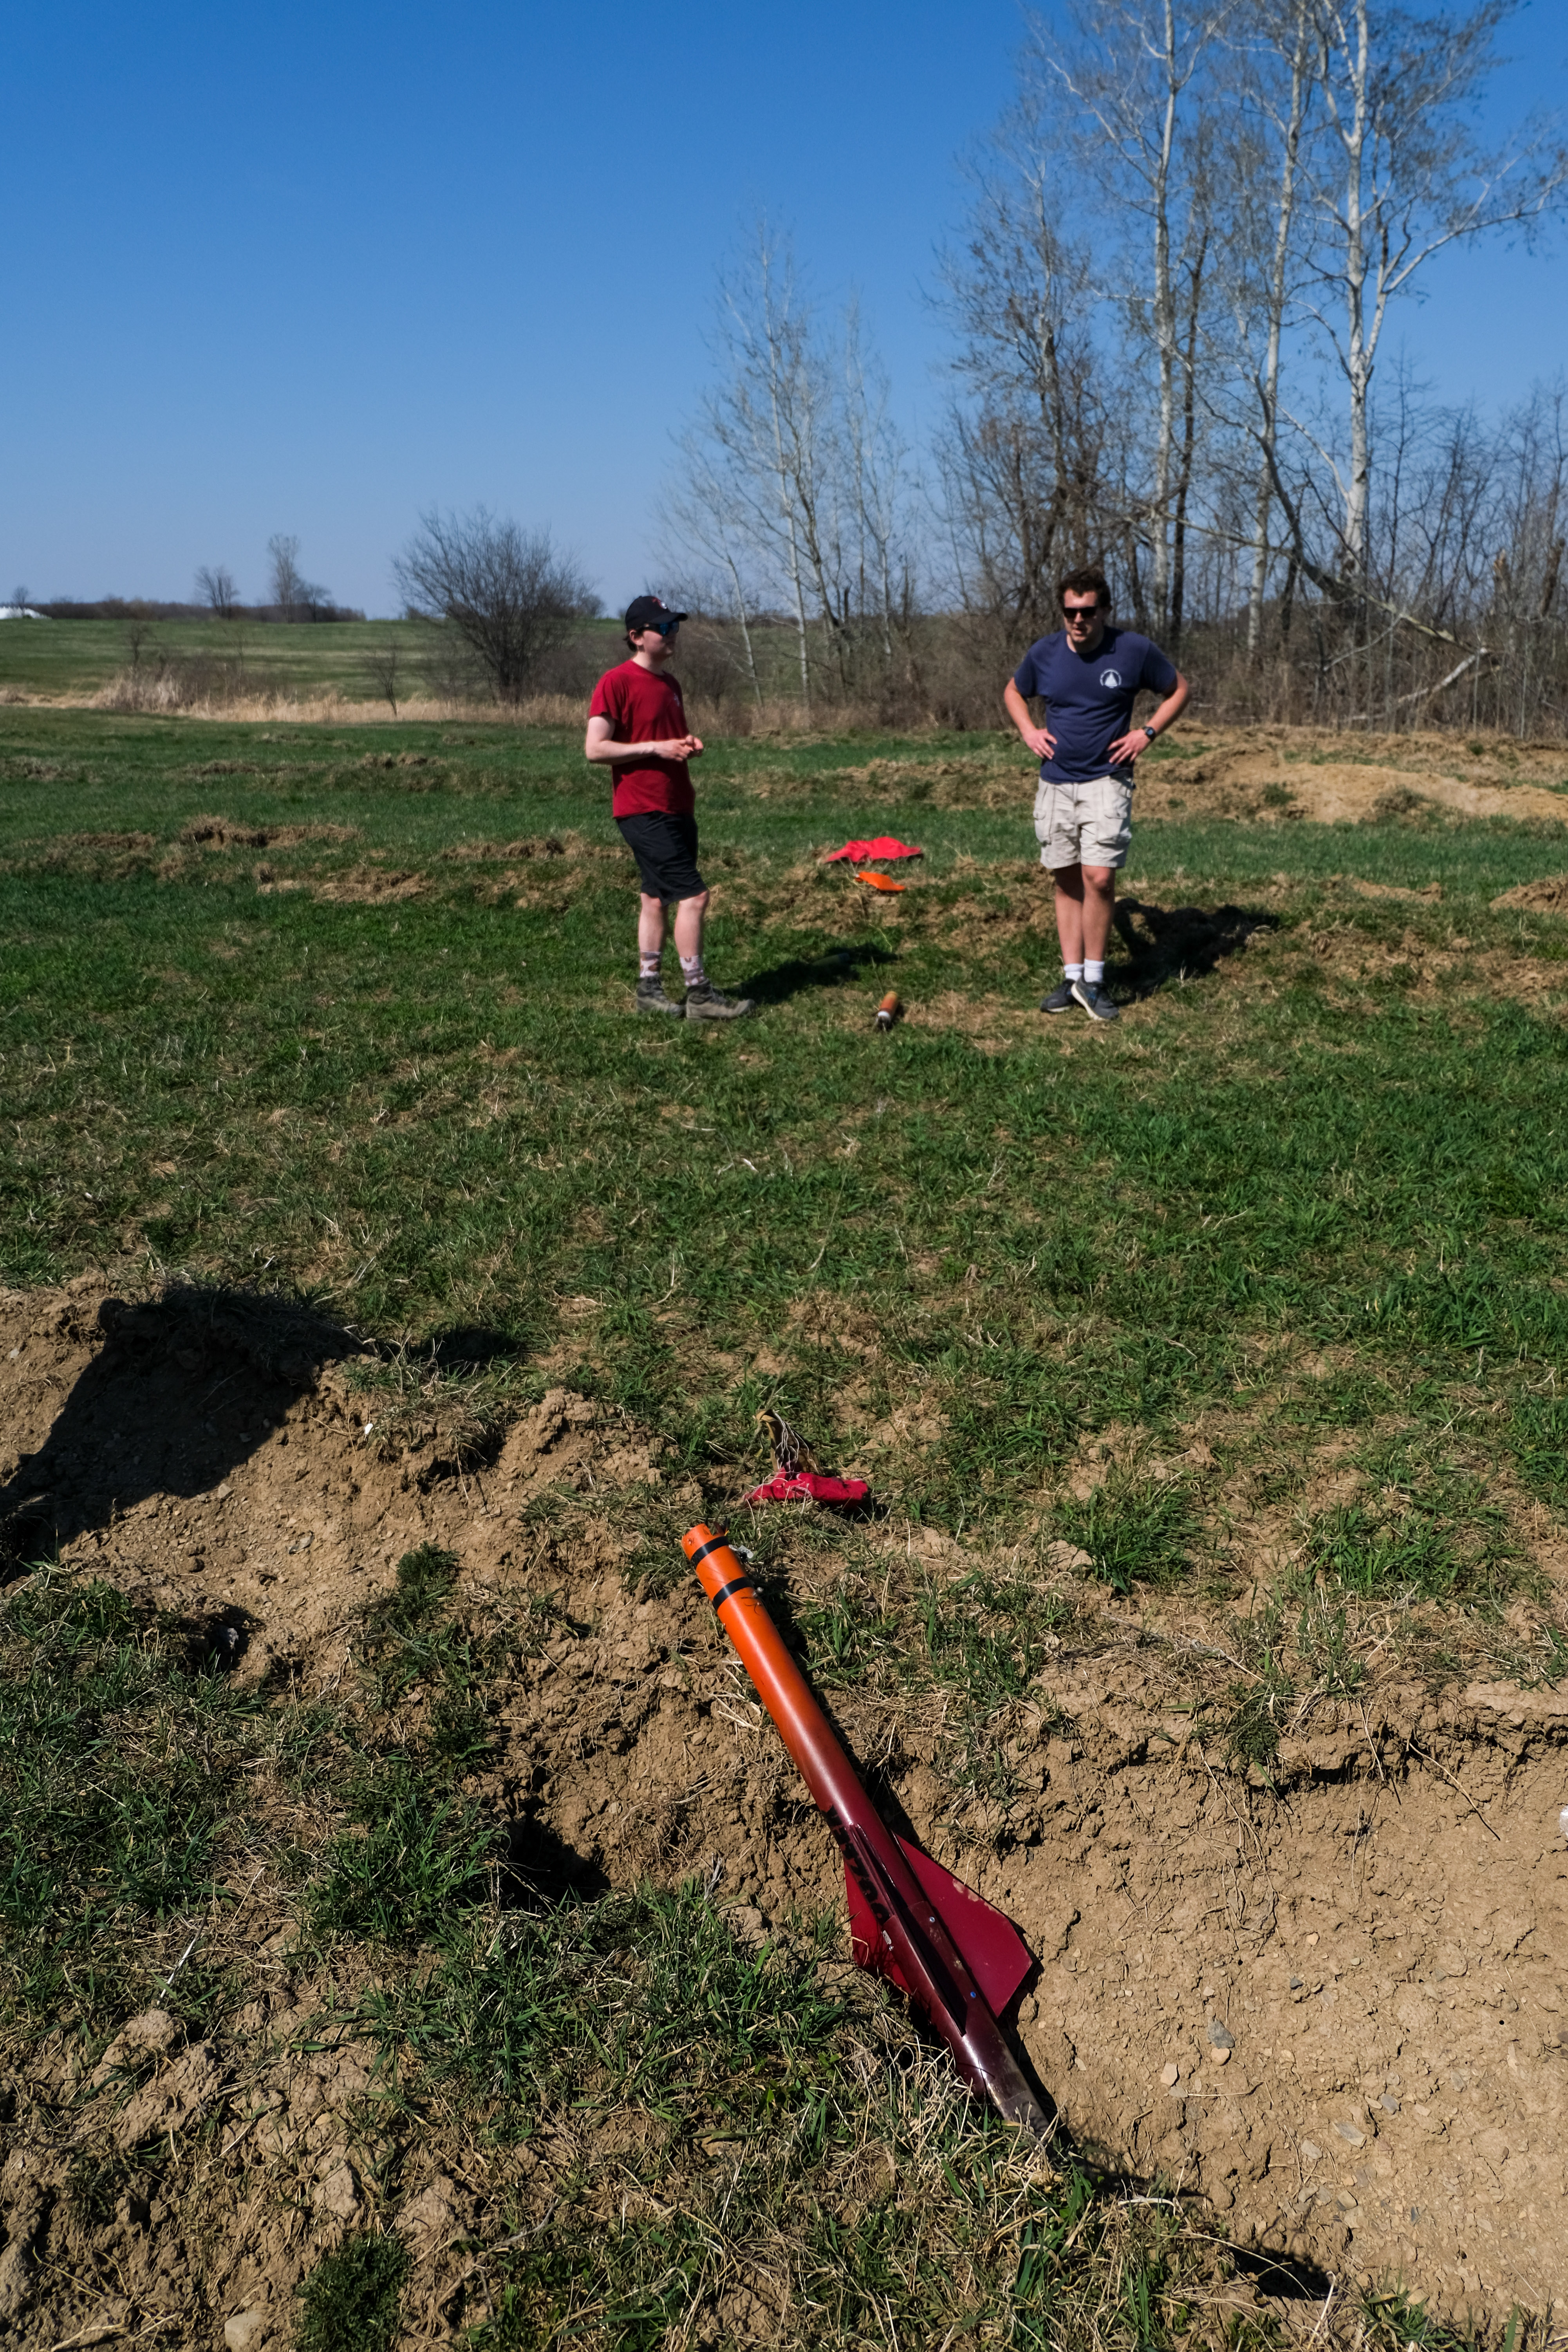
The issue should have been caught when testing avionics the day before, and we should have brought spare batteries to the launch as well. The fix was pretty straightforward – just clean up the solder around the hole – and this first attempt let us practice assembling the rocket and refine our launch checklist.